How I Light Interviews in the Mountains // Flexlight Overview

How I Light Interviews in the Mountains // Flexlight Overview

Bringing gear for shooting interviews into the mountains is quite the task. I wasn't even planning on taking lights while shooting the slacklife series because all of the extra weight. That is until I found out about the flex light kit from westcott. This kit has made me fall in love with lighting interviews in the outdoors. I simply didn't consider bringing lights with me until this kit came along. 

On the series I used this gear as my lighting kit:

Flex 2-Light X-Bracket Kit - https://www.fjwestcott.com/flex-2-lig...
Flex Battery - https://www.fjwestcott.com/flex-porta...
 

You can check out the trailer for the series we shot here, the first episode will be coming out in March! So stoked.

Pictured above is my ideal interview setup. I'm using the RODE filmmaker kit for my LAV audio, and the NTG3  over head for the best interview sound I can get. To the left I have the flexlight 1x1 set up as my key light, softening the light through a generic softbox I got on amazon. The Panasonic G7 is mounted on top the Kessler second shooter for some smooth interview pans. 

And this is what it looks like with all the pieces in play. I'm monitoring audio, camera, and knocking out a fantastic interview. That's how you gotta roll as a solo filmmaker, and I honestly wouldn't have bothered taking lights at all if it wasn't for the extremely portable flexlight kit. 

Pictured above I am adjusting the output of my keylight. Having a dimmer you can hold near your camera is extrememely handy for dialying in the lights just perfect. 

If you have any questions about this setup be sure to let me know. Make sure to subscribe to the Leftcoast TV newsletter so you don't miss any new videos!


CHECK OUT ANOTHER RAD TUTORIAL!


LEARN FILMMAKING

This is the fastest way to get the latest adventure filmmaking education from Levi Allen!


Unsubscribe at any time

A Year with the Kessler Crane Second Shooter

Disclaimer: Right off the top, I need to let you know the Second Shooter I was using this past year was on loan. I purchased my first real slider (you know the kind I didn't make out of PVC pipe and skateboard wheels) from Kessler Crane in 2012, and since then i've been a proud customer.  Kessler lent me a Second Shooter to use while shooting Untethered. The opinions of this article and the video are my own, I have not received any payment from Kessler. 

This past year I've been testing out a new addition to my camera support kit. I finally got into the motion control game and have been extensively using the Kessler Crane Second Shooter along with my already owned Kessler sliders. I wanted to share my experience of putting this gear to test throughout  this past year and why I've come to love this piece of MOCO gear. 


An intro to Motion Control

The Second Shooter is essentially an addition of motors and a tiny computer to a Kessler slider. This system allows you to set keyframes for different positions on the slider, and then move the camera between your set positions automatically. You can use this for Timelapses moves over long durations of time, or you can use if for live motion setups with the looping feature. 

 
My favourite traveling timelapse set up. A 2 Foot carbon stealth paired with the slider motor. 

My favourite traveling timelapse set up. A 2 Foot carbon stealth paired with the slider motor. 

My Favorite Features

Modularity

The biggest feature I love about the Second Shooter is the modularity. The options for different configurations are endless, and yet you are never committed to one exact setup. Sometimes I would use the pan and tilt head, other times I would just use the slider motor.  You can use it dozens of combinations with all of Kessler's sliders. I often take a 2-Foot carbon stealth with me into the mountains and use a larger Cineslider when back at the studio or shooting time lapses where I want longer camera moves. 


Straightforward timelapse setups

Using the keyframes and the controller to trigger your camera, adding motion to timelapses is a really straightforward process. I've used several systems previous to this that were extremely complex. The Second Shooter makes figuring out intervals and durations really easy. It has handy built in duration calculators and each parameter is flexible making it really easy to add additional frames, or extend the interval. It also has awesome shoot–move–shoot functions which allows you to capture long exposures and not have the camera move. 


Rock Solid Interview Looping

The looping feature of the Second Shooter is definitely the most frequently used when I am shooting.

It's amazing how much a controlled parallax slide can add to a very generic interview set up. With the pan and tilt head you can track your subject across an entire slide. This feature alone merits an investment into motion control. The ability to do complex timelapse moves is all just a bonus in my opinion. 


BUILD QUALITY

The build quality is another feature that I’ve really come to appreciate. I am super tough on my gear, I take it with me everywhere and I am using it constantly. Throughout this past year, my equipment has help up brilliantly and shows no signs of slowing down anytime soon. 

Using THE Manfrotto Magic Arm

A helpful tool to use alongside the Second Shooter is the Manfrotto magic arm. Using this arm I was able to place the camera off axis from the slider. If that's looking down over my subject or doing timelapse moves low to the ground. 

I feel like I am just scratching the surface of what I can do when using an arm in combination with the slider.  
 
IMG_5063.jpg
 

Supporting a Single Tripod

It is also helpful when shooting on tripod setups and you want to help support the other end of the slider to prevent weight sag. 


Shooting Untethered

When shooting Untethered I used the timelapse function of the second shooter to help capture these gorgeous transition moments. These time lapses were key to the edit and the way the storyline came to gather. The added movement helps give a sense of time passing and I used these shots to help separate the different scenes of the film. 


The Second Shooter is Dead Easy to Learn

Lastly, I have to say the Second Shooter is incredibly intuitive to use. I tend to avoid instruction manuals, and on my first day using the second shooter I had it up and going, getting fantastic shots, in under 15 minutes. I have definitely had experiences in the past with motion control equipment that needed a book to learn. I can teach someone else how to use it in under five minutes, this is huge for getting additional hands up to speed. 

What did I find challenging when using the second shooter?

  1. Cable management
    • This is less a fault of the second shooter, and more a reality of motion control setups that are modular.    I don't like needing to remember more cables or have other cables to look after. That is just one of the pains that goes along with these kinds of setups. There newly released TLS seems to offer better cable management as the controller and battery travels on the same sled the camera is one. 
  2. No way to set limits on the controller for slider length
    • The most common error I make when setting my keyframes is sliding the camera to far to the right or the left. I usually make this error because I am trying to set it up fast, or I am doing two tasks at once. When you hit the end of the slider track, the motor can sense there is something wrong and resets the controller. This is frustrating at times because you then loose the keyframes you just set and need to start over. 
    • I don't know if there is a solution to this, but it comes as a byproduct of the controller and motors being able to work with various different slider lengths. I wish there was a way to tell the controller which slider length you were using, and where the start and stop points are, and then have the computer remember it for all future keyframes you set. 

Would I Choose the Second Shooter again for My Next Big Project?

I like to use the best gear that is available for me to use. If there is a better option of any piece of gear that exists, I am often looking for it and trying to use that instead. As a principle I have a hard time settling for equipment that is "almost good enough" to do the job. 

So when I ask myself, "Would I chose to use this piece of gear again on my next big project?"

The answer is, yes. And in closing I can boil it down to two reasons for myself. 

  1. LOOPING FEATURE: This system offers the most reliable interview looping feature I have been able to test out. 
    • It can be packed down into a bag I can travel with
    • It is quick to set up
    • It is reliable and does the job exactly how I would want it to
  2. FLEXIBLE TIMELAPSE SETUPS: The second shooter can adapt to all of the slider products available from Kessler. I am never locked in to a certain setup, or by a slider length or style. If I want bigger I can go bigger. If I want to go timelapse only I can go timelapse only. 

I’ve really come to love and rely on my second shooter. From shooting on set to life int he mountains It really is a trusted  member of the Leftcoast team. 

I’m thankful knowing my investment in the Kessler Eco-System is going to bring value to my series for years to come. I want those to actually be tools that are going to last me and not be outdated.  


I want to say a huge thanks to Kessler for letting me test their gear while shooting my film, and creating tools that empower me as a filmmaker. 


Which Video Mic Should You Buy For Indie Documentaries?

208_audioTutorial_pictures.jpg

Getting good audio can be scary to say the least. For most of us it’s an area that’s hard to wrap our heads around, and unfortunately it often gets just scraps of our attention. If you are an indie filmmaker like me, I challenge you to  start taking responsibility for making sure our films have better sound. In the documentary space it can be tempting to get lazy, but I assure it’s such an important aspect to what makes a film feel immersive. Shooting Untethered I had a really simple audio kit. Using some basic principles though I was able to capture great on location sound while keeping things in my budget. I had to be flexible and light as there was no dedicated audio person for the shoot.

Watch This Video Where I Talk About My Ideal Sub 400$ Audio Kit


My Indie Documentary Audio Kit


Rode VideoMic - Find Prices Here

The Rode Videomic basically lived on both cameras the entire time while shooting. I got fantastic audio from this mic and I am really happy with the results when paired with the GH4 and auto levels. I didn't have clipped audio once, and I am satisfied with the minimal amount of hiss I hear in the audio.

I like this version over the videomic pro because of the lower price point, longer barrel (better for side noise cancelling) and I also purchased this right before the new videomic pro was released with the better shock mount. This shock mount is the best in the game, love it. No fiddling with stupid rubber bands.

Zoom H1 with Gian Squid Audio Lav

Zoom H1 With GianT Squid Omni Directional Lav - Find Prices Here

This package right here as been a work horse for me. Most wireless systems cost a lot, and frankly can be kind of finicky at times. I really like having a system I know just works. I also love that it needs only one AA battery and your good to go for hours. I used this setup constantly on Untethered in order to get great sound of the athletes when they were walking on the line.

Zoom H1 Audio Shock Mount

Zoom H1 with Shock Mount - Find Prices Here

Another way to use the H1 is as it was mainly meant to be used. As a stereo capture device. I love mounting this to the top of my camera with a shock mount and running the feed straight into camera. As you can hear in my video examples great stereo audio is super immersive. This setup is cheap, simple, and gets amazing results. Make sure to buy a H1 windscreen!

Two Tools To Step Up Your Audio Game

For the sit down interviews I shot with spencer I used a more elaborate boom mic set up. I was lucky enough to borrow the fantastic Rode NTG3 which is a crazy awesome shotgun mic. I ran it into a DR60D (pictured above is my new DR70D which I like a lot better for form factor). This setup is incredible and I definitely recommend renting or investing in a good set up like this down the road. You can get some amazing interview audio with this mic!

The First Tool You Should Buy For Camera Support

Today we are going to look at the best piece of camera support equipment on the market for adventure filmmakers. Or any filmmakers for that matter. 

DSC05992.jpg

As indie filmmakers we should always be looking for gear investments that have the highest possible ratio of cost vs. results. With that in mind, the tool I am recommending is not a 3 axis gimbal, it’s not a drone, it’s actually just a plain old tried-and-true monopod. You’ve probably seen one of these before, and maybe you’ve thought, hey that works for that wedding guy, but I prefer my tools a little more high tech or pro looking. Don’t think of yourself as too good for the monopod. I am going to show you why this tool can help move the needle the most on achieving cinematic results for the lowest upfront investment.

DSC05996.jpg

I think this tool will be the fastest tool to help you develop your cinematic eye.

A monopod allows you to be more mobile and flexible than almost any other tool. It is the fastest way to cover many different perspectives of a scenario and then decide which ones you like the most. I’ve seen people who started out by purchasing a tripod and a slider. Then they mount their slider to the tripod and try to shoot from that the entire time. In the edit room they are trying to decide what to do with all these shots that just slide left to right from the same perspective. That’s because in a way the visual aspects of filmmaking is like good writing. You need to use varied words and expressions in order to create a pleasant cinematic experience. You can’t add an exclamation point on the end of every sentence and call it engaging writing. The same goes with filmmaking. Camera movements should be used intentionally, and a monopod helps you learn the foundations of these principles.

DSC06001.jpg

The Best Monopod Out There

Simply without question Sirui is making the best monopods on the market. The model I recommend is the Carbon Four Section Monopod from Sirui. If you would like to save some money you can go with the the Aluminum Four Section Version. I really do recommend the weight savings of the CX version though.


You are also going to need a fluid head of some kind

I like the heads from Manfrotto, but literally any brand of fluid head will do the trick.

DSC06005.jpg

A Mind Blowing World Record Jump

WorldRecordRzrJump.jpg

https://www.youtube.com/watch?v=F0DCBebgdUc

Hidden away in a small valley on the top of Sumas mountain in the quiet town of Abbotsford British Columbia, is the compound of a man named Al. This man is single handily making a loud statement about the quality of his craftsmanship for our viewing pleasure. Al is progressing the sport of UTV racing and… well…. UTV jumping more than anyone one else in the country.


Stock UTV Rzrs bought off the lot are definitely not equipped for this level of performance.


RazorJump_Stills_May2015_00158
That’s where Al’s company Concept Distributing comes in and outfits these machines to be powerhouses that are actually safe to jump.


Al’s workmanship creates beautiful pieces of art, the chassis he builds for these machines are incredible.


RazorJump_Stills_May2015_00176
What’s even more awesome, is he is willing to prove firsthand how much he trusts his work.

Shattering World Records

Working with Brad Friessen, we had a great opportunity to come out and document some serious record breaking take place.
A001_C035_05186V
On this project I was the Steadicam operator, Secondary Drone pilot, and also handled all the Post Production and Editing. The piece itself was put together and coordinated by Brad Friessen, who was also the amazing Helicopter Pilot. The video was made for Brad’s recently launched Helicopter Youtube Channel that you definitely need to subscribe to.
 

Shooting for the Edit

On a day like this there was a lot of downtime in between the different jumps and lots of prep time involved with pulling off a stunt of this size. Safety was a high concern and so nothing was rushed. It is so easy to over shoot and end up with a loads of footage you won’t need, and as a result potentially miss out on key moments. I find it is far better to instead of just roll your camera on every thing that is happening really look for those key moments that you know will actually end up in the edit. Your editor with thank you a thousand times over, trust me.

A001_C031_0518KV

Getting Into Those Hard to Reach Spots

Screenshot 2015-08-13 20.54.13
I love shooting with the GoPro cameras for stunts like this because it allows you to get into these hard to reach areas that provide an amazing perspective. With this video there is a lot of the same jump happening over and over and getting that visual diversity is key to help keep the viewer engaged.

The Gear

Inspire 1 and phantom 3
Josh Knepper was operating the Red Dragon out of the helicopter.
We had a slew of Hero 4’s mounted everywhere you could imagine.
There was a GH4, a canon 60d and a 7d.
RazorJump_Stills_May2015_00180


For the multi rotors we had two quads from DJI brought and piloted by the team at Sugarshark productions.
IMG_9690-2


I had a chance to shoot on their Phantom 3 while watching Mark and Anastasia shoot tandom with the Inspire. Watching them thread the needle with the inspire really impressed me with the amount of control they could have with this copter at high speeds. DJI is certainly doing something fantastic with their higher level drones.

Join a Filmmakers Collective

Do you want to get insider updates on all of my film projects? Join the Leftcoast Collective. It's a weekly newsletter filled with fantastic value, resources for growing as a filmmaker, and behind the scenes posts on all things Leftcoast Media House.Common, what are you waiting for? We would love to have you. I'll send you a free guide as a welcome gift.
[yks-mailchimp-list id="e34efe9754" submit_text="I'M IN!"]

Taking Event and Travel Videos to the Next Level

MakingAwesomeEventVideos_title.jpg

MakingAwesomeEventVideos_title

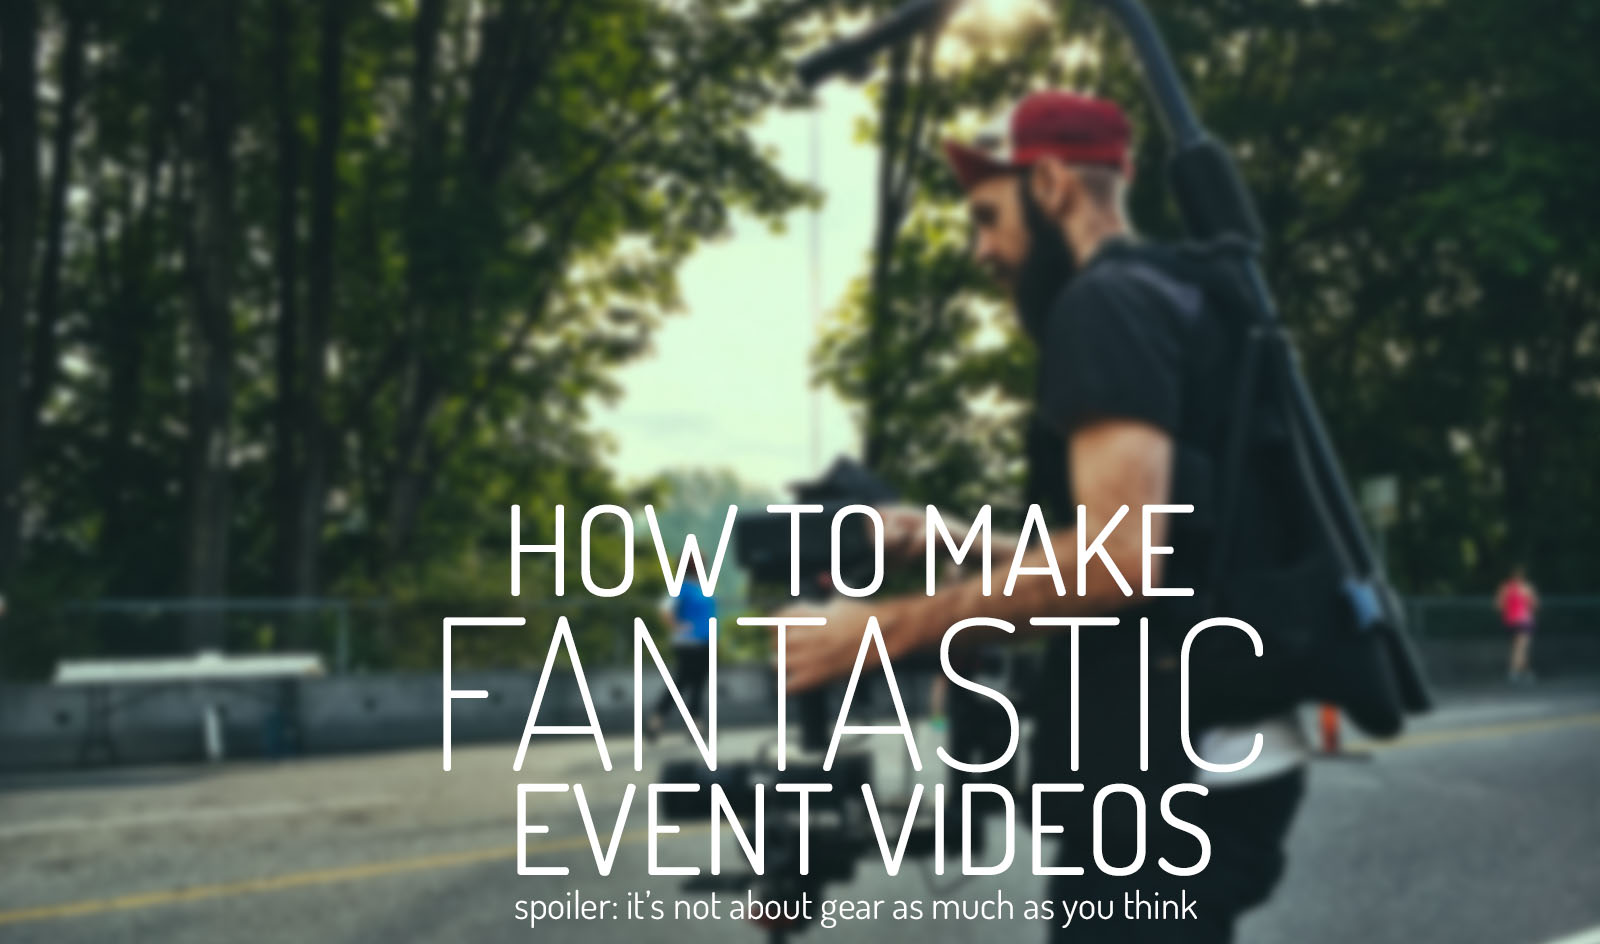
I am going to teach you a few tips on how to take your next travel or event video to the next level. (Spoiler Alert: Gear doesn't help as much as you would think)

Okay, so you feel pretty comfortable with your camera. You know how to work it and you think you could tackle documenting  your travels or shooting that next event video you've been hired to make. But you might be asking, as I have been asking, "how do you take your video from being just a simple montage to an intriguing story."I encountered more answers to this question on a recent shoot I got to help with. The event video is in a category of its own (as far as event videos go). Yes, really expensive gear was used on the shoot, but there was more happening than just gear.  Today I am going to share with you a few of the simple steps i've been learning about developing your story and improving your videos dramatically. 

I am going to use this event video as an example of how you can incorporate story elements into your videos. First I want to give you a little bit of context to this project. As I wrote about earlier, I truly do feel that one of the best things you can do when exploring using your passion to make a living, is getting to do the actual work hands on. The actual work itself; the daily grind. Not just the dream you have in your head of what it could be. The fastest way I can find to do that is working temporarily for another company. Taking this step is totally okay on the journey to growing your own company. You will learn more faster and get to see the inside workings of a company first hand.

This stage of working for others is what I currently am at. I sought out working with a fantastic production company here in Vancouver City, Transposition Films. It's a small operation that consistently pumps out stunning content of top quality. I really respect the two partners that own and run the company; Ryan and Josh. Working with Transposition so far has been a blast.

Levi Allen shooting with Josh Knepper
Above is the DP Josh Knepper and Myself!

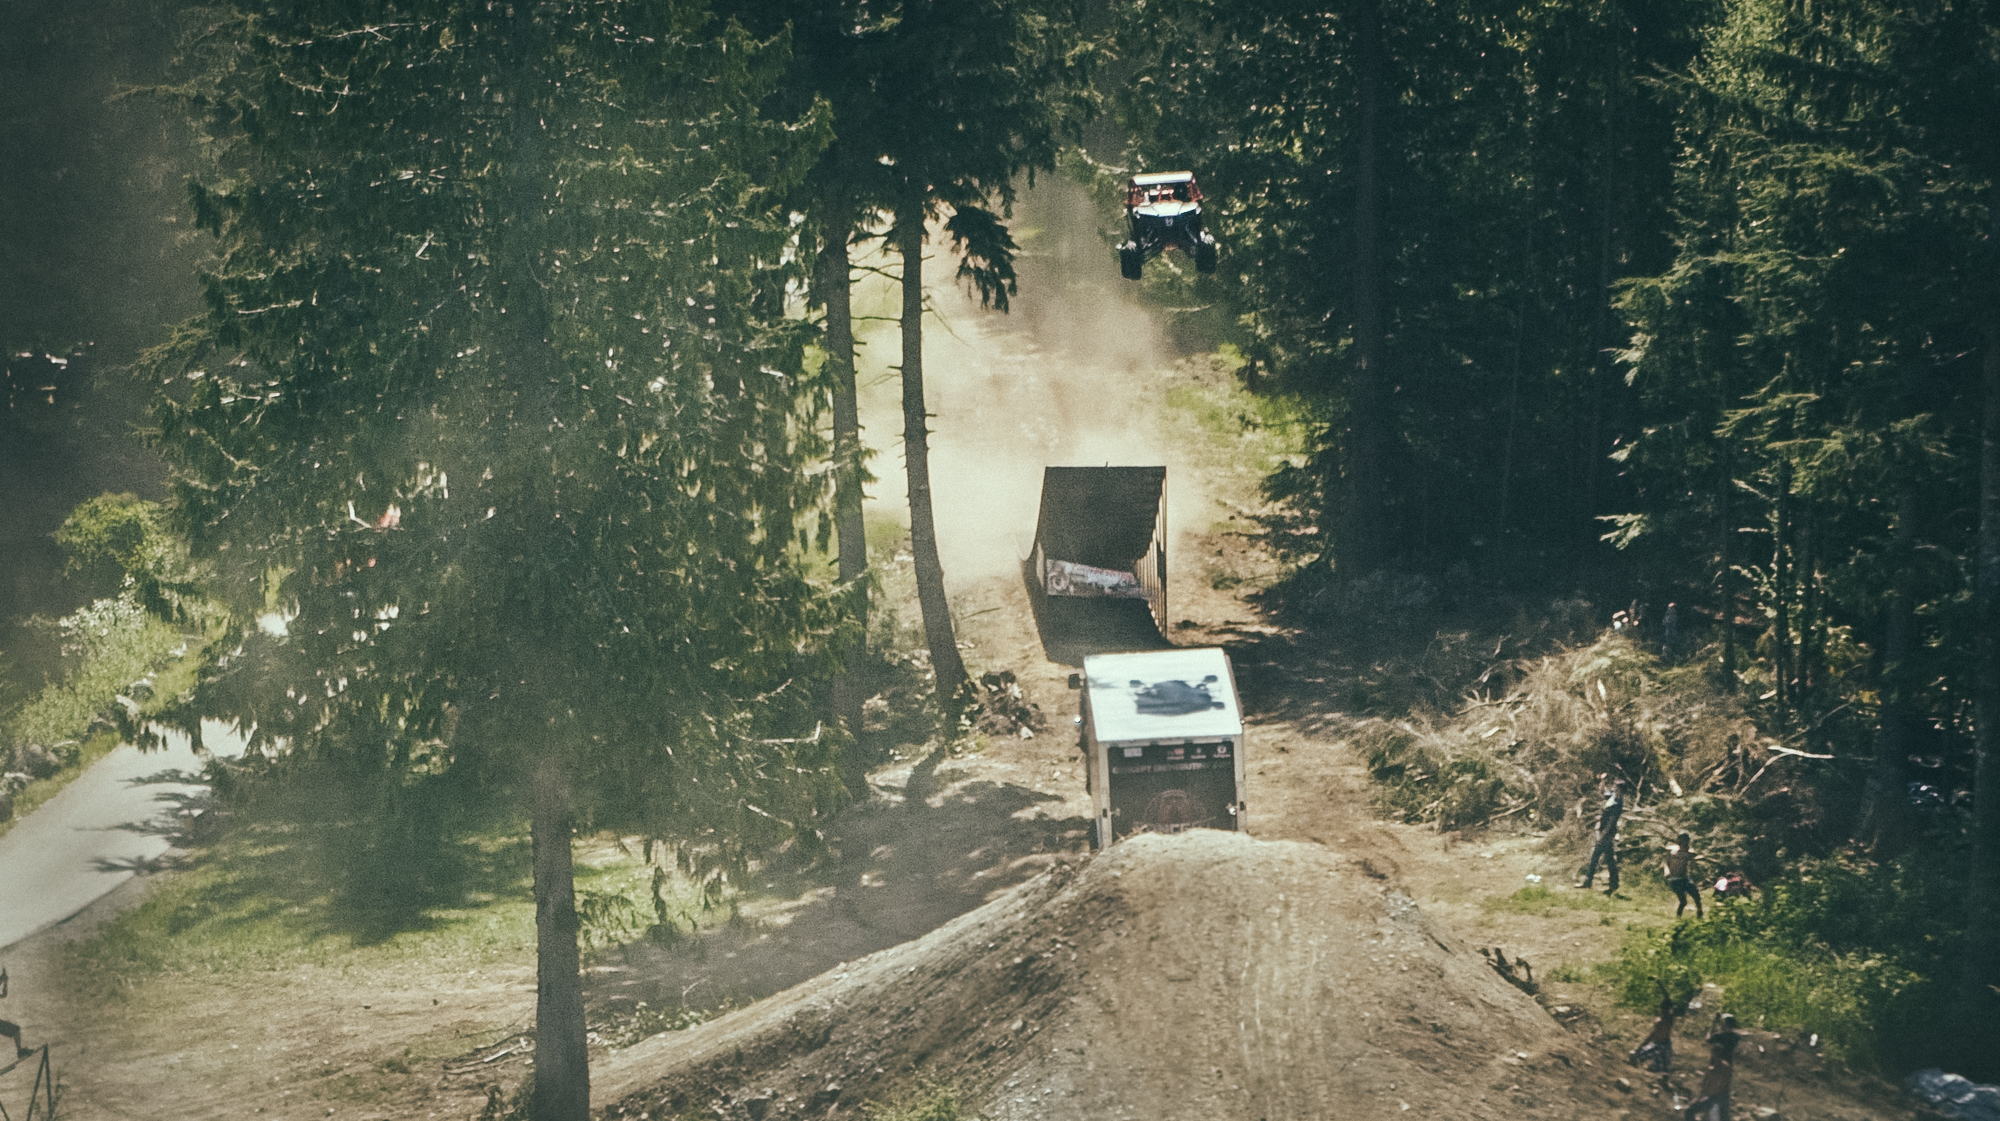
This video was produced by Transposition Films. The role I played was helping the DP Josh Knepper operate the A Cam.  I only played a small part of the production, but I will speak of the project from a holistic perspective. The credit goes to the all the others that worked hard to make this a reality.

Pretty Fantastic Video Right?

I mean as far as event videos with extremely tight turn arounds go, this one turned out fantastic. I have to say my favorite part and what I believe really brought it to the next level, is the way the team was able to develop a story around this production.

SO MANY TRIP OR EVENT VIDEOS END UP BEING 5 MINUTE MONTAGES OF RANDOMLY STITCHED TOGETHER SHOTS. QUITE BORING ACTUALLY.

So often when setting out to make a video you can feel desperate that you need to get enough coverage of absolutely everything. Then when you go into the edit you feel as though you need to include all the components of what you shot. This is the first misnomer I am going to debunk.

Your Video Can't Possibly Include Everything, So Stop Trying To.

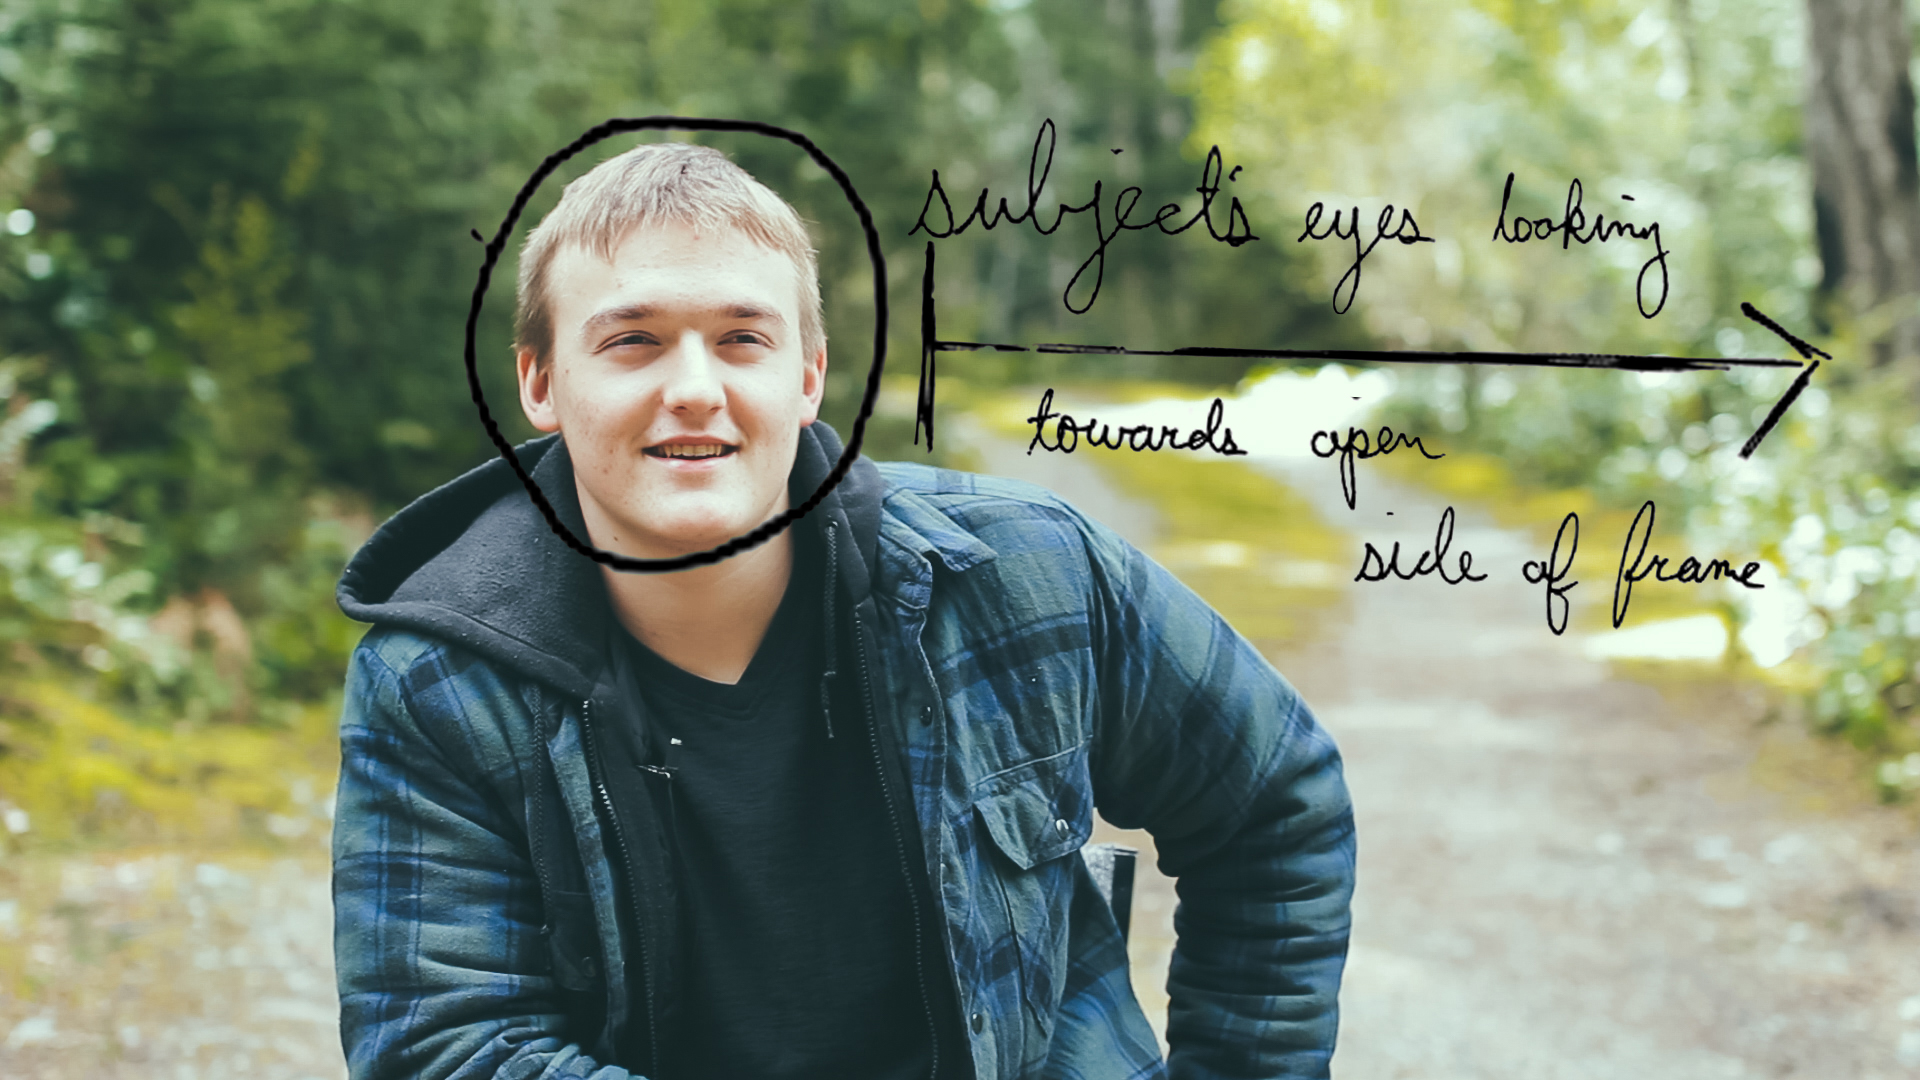
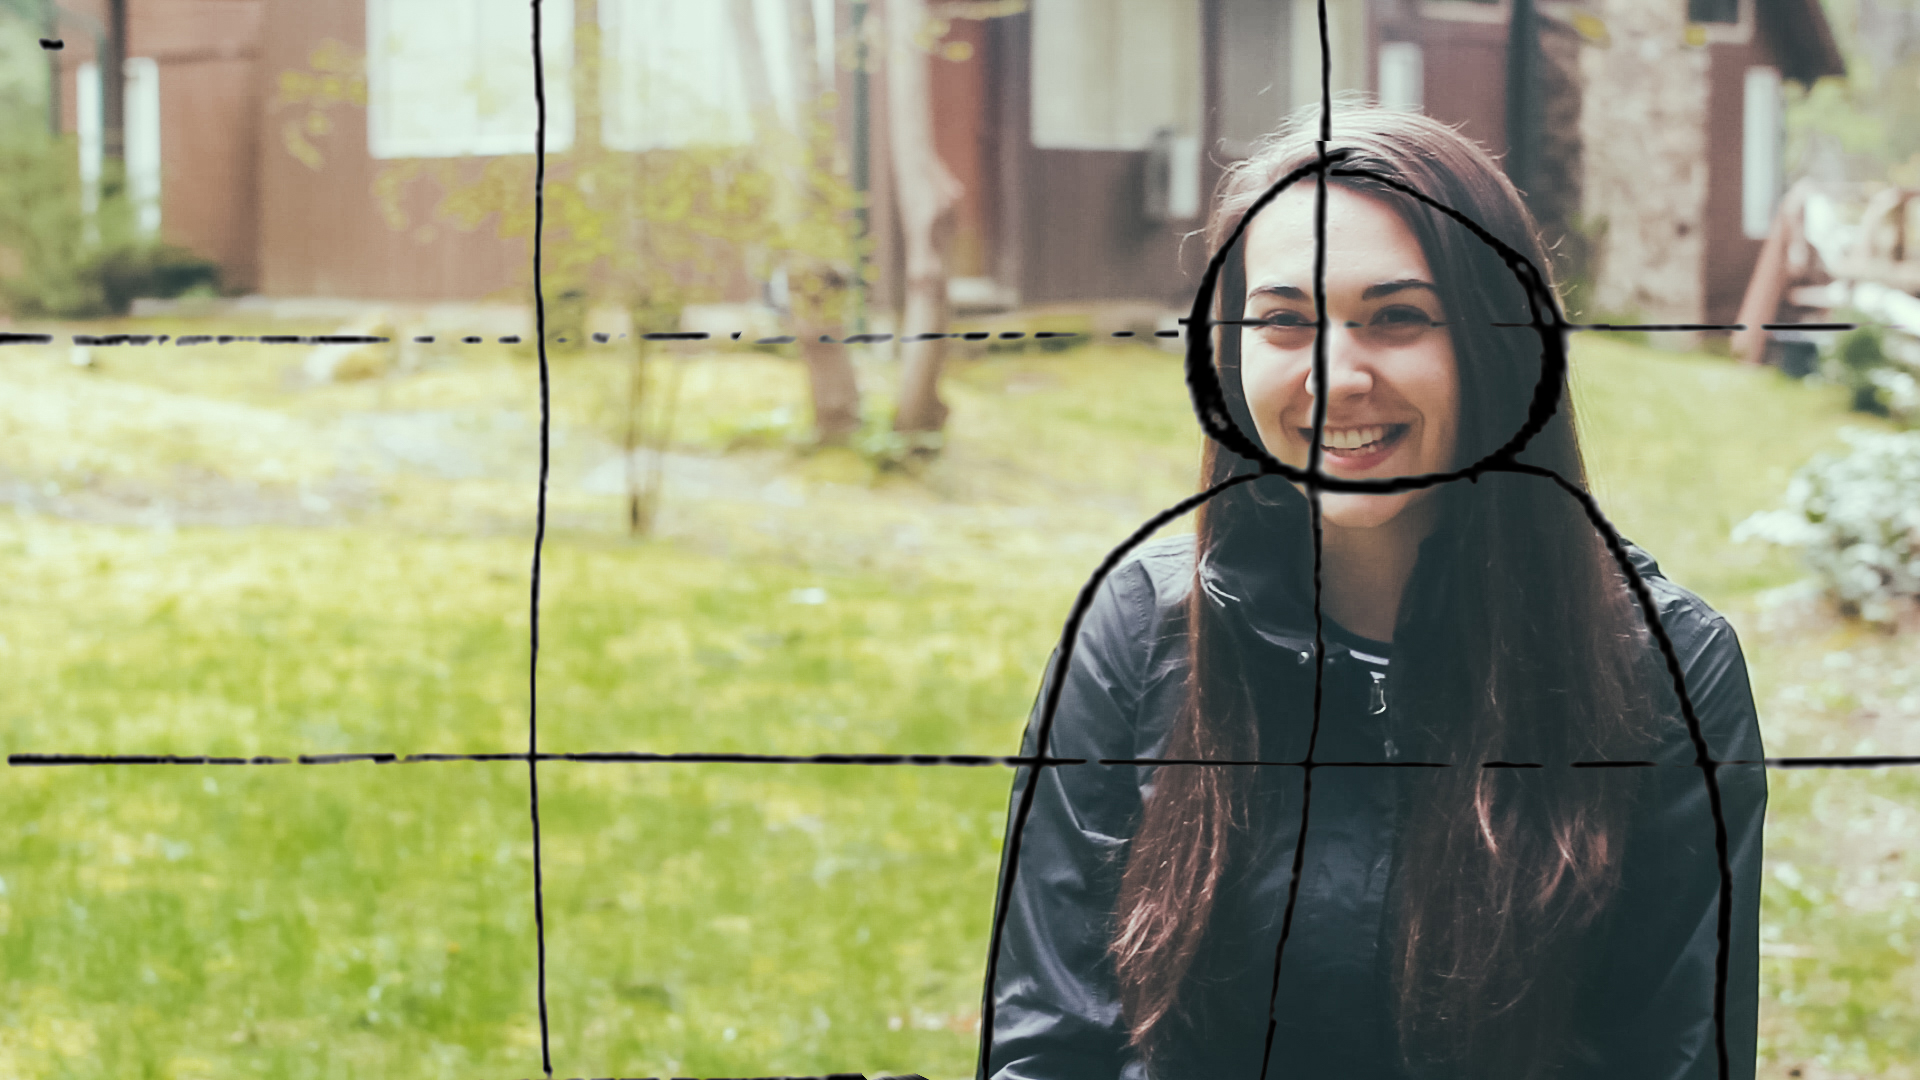
Less is more. Focusing in on a visual motif, a story line, something that can carry the piece along. These are all critical steps to kicking things up a notch. This is one of the most important things I have to say. So hear me now, focus in on a single element of what's happening in your video. Is it an event with people at it? Focus in on one person to try tie the whole thing together and show their experience. Making a travel video? Try share why you are visiting certain locations and why the viewer should care about the landscapes you are showing them. Share in the video how they moved you. With the Run For Water video there was so many things we could have included. Literally thousands of options. Instead of trying to include it all we focused in on one component or storyline. The piece is infinitely better for this reason. There are many storyline options you can chose from.

Screenshot 2015-06-04 19.29.17

I just saw a travel video made by Jeff Sheldon. I really like this video because Jeff implemented good visual storytelling without having crazy expensive equipment. He implemented a strategy to give the beginning of his video more focus. His filming wasn't incredibly complex or with expensive gear, but he used the tools he had and focused in on a component of the story. You can find the video here https://vimeo.com/110170664.

Jeff starts off this video with the shots of feet walking on all sorts of different ground. It really helps establish the feel of a travel video and that there were a lot of places visited. It focuses the viewer in to this idea that they are experiencing a trip from the perspective of Jeff, the owner of those two feet. It is something so simple but starts off the video so well.

Try to Develop a Story Thread Beforehand

Putting in effort on the front end to develop or think about your potential story, helps give you focus when it comes to the day of shooting. Doing this before hand means you're  not trying to piece together a thread afterwards from the footage that you already shot. The concept for the Run for Water film was simple, a mirrored day in the life of a girl doing the run to raise money, and a girl that will benefit from the donated money. Since we developed this story thread ahead of time we were able to get strategic shots of our talent on the day of that helped to tie the whole piece together.

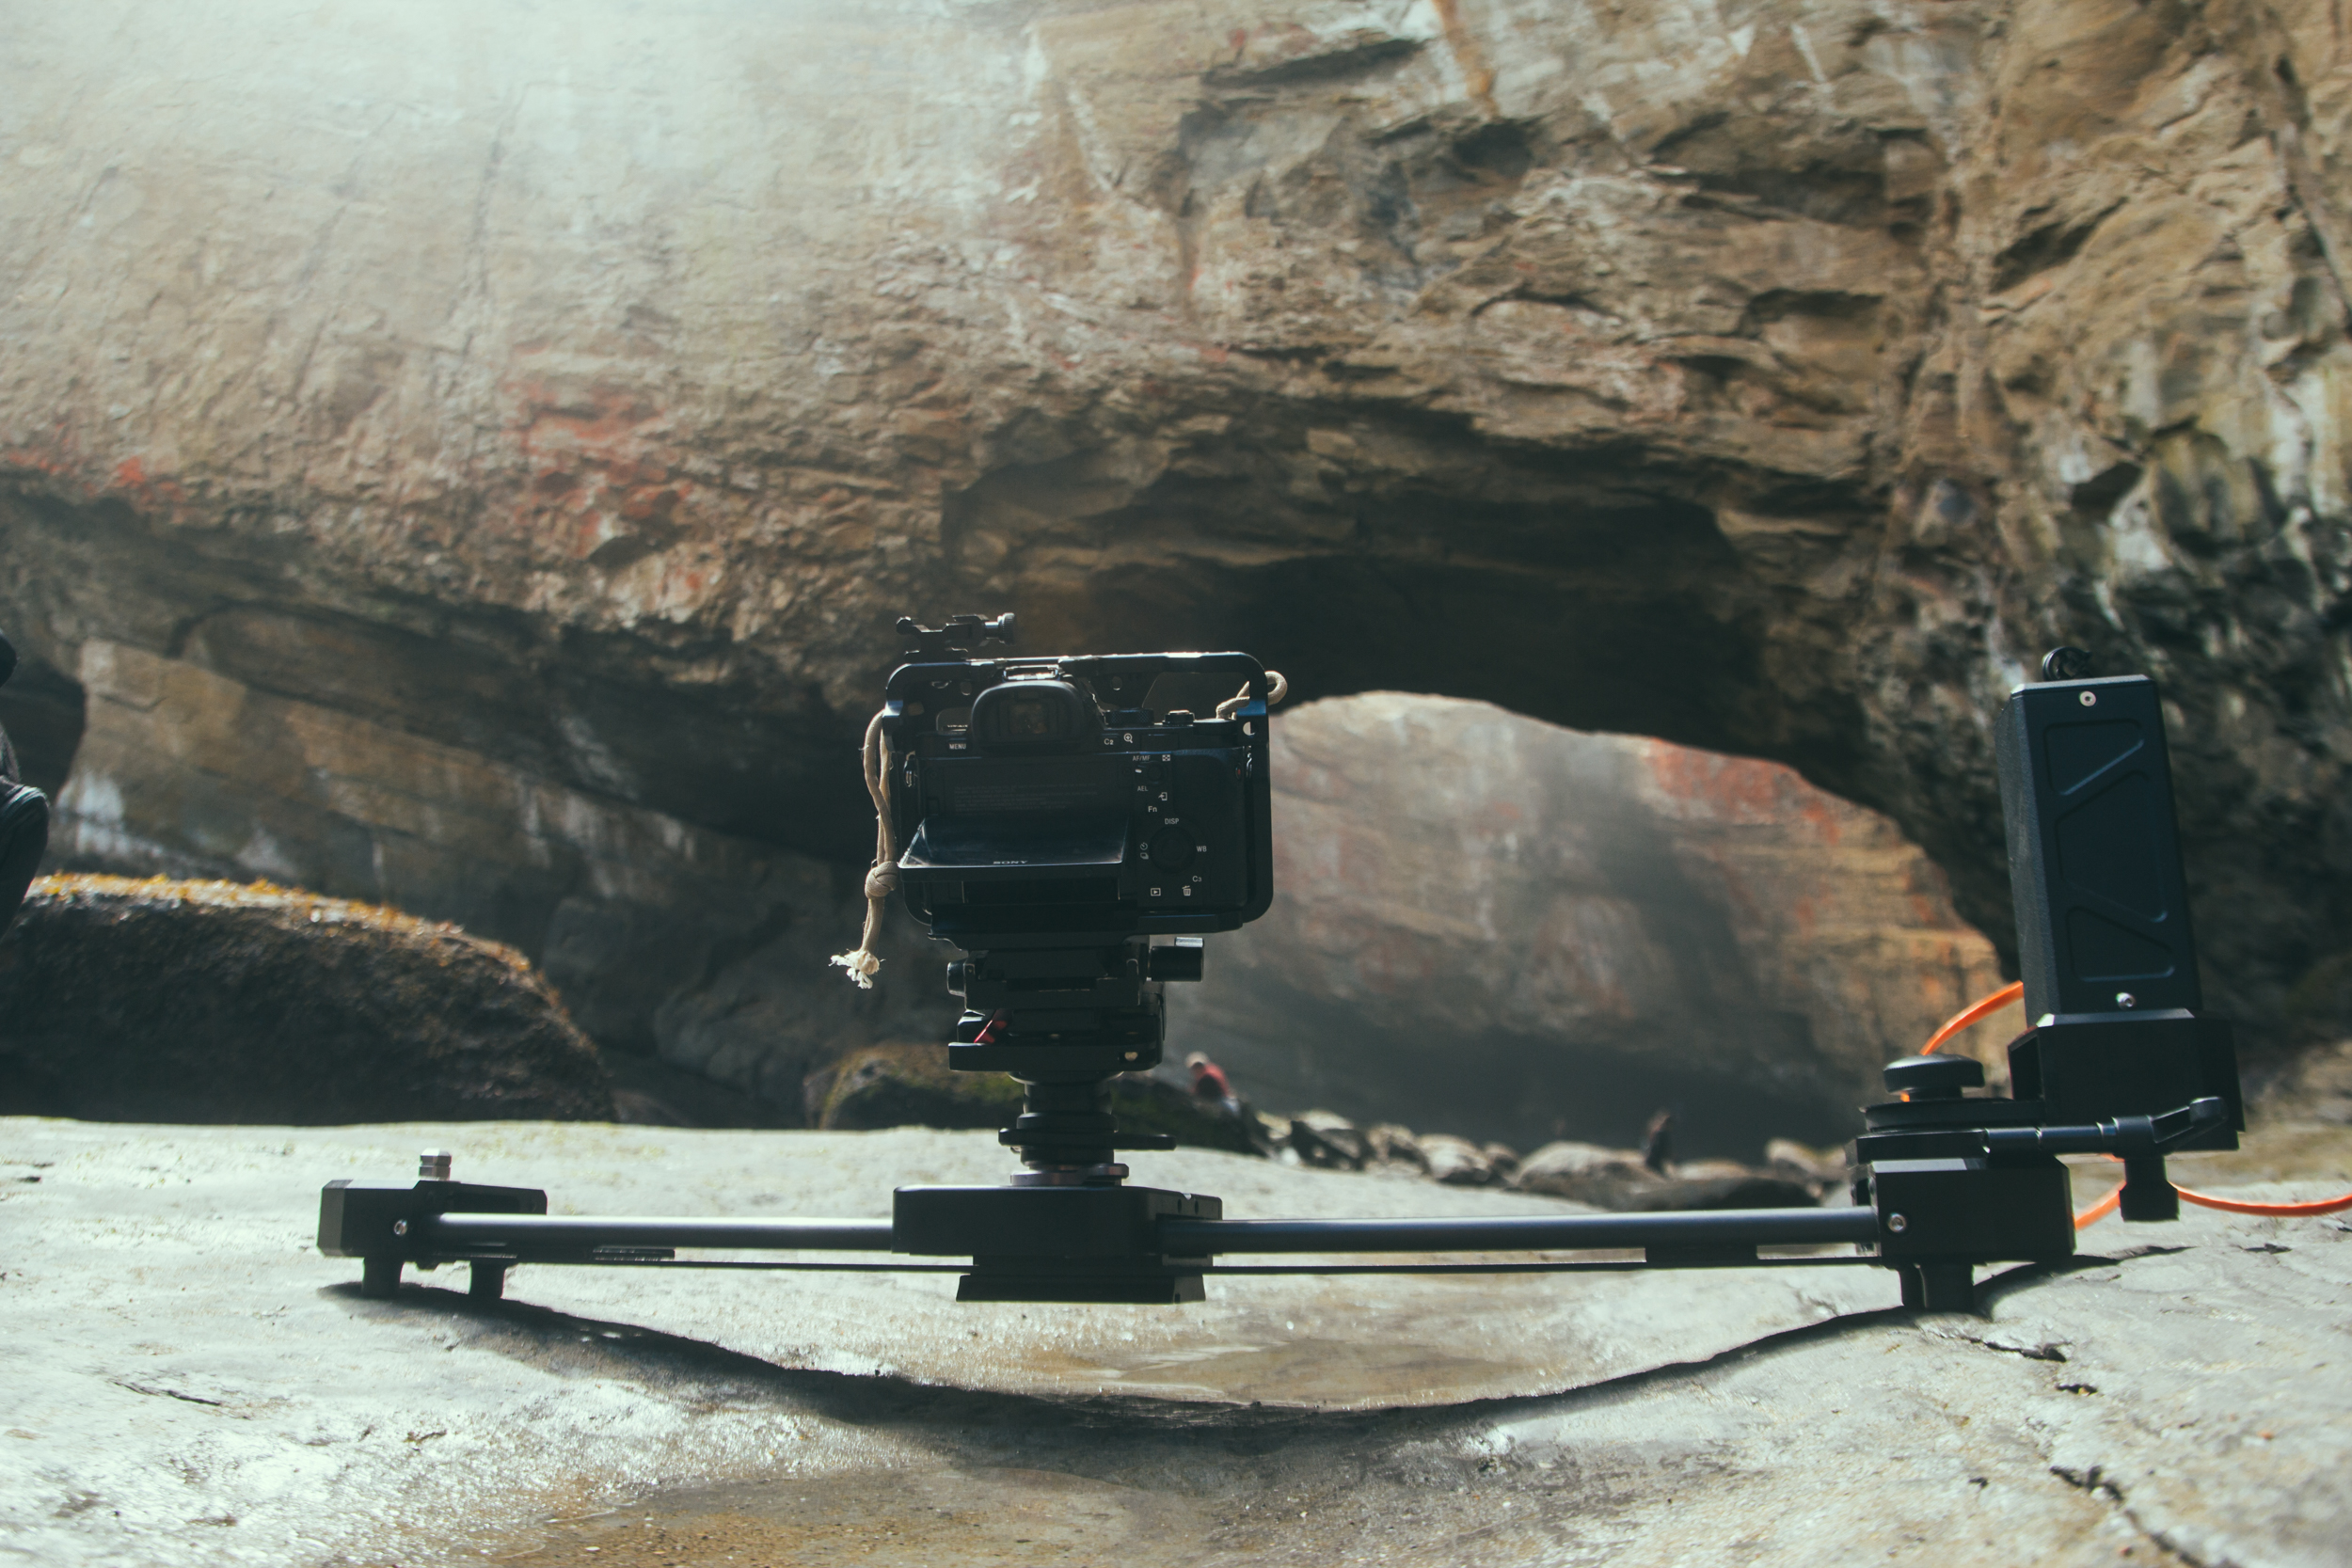
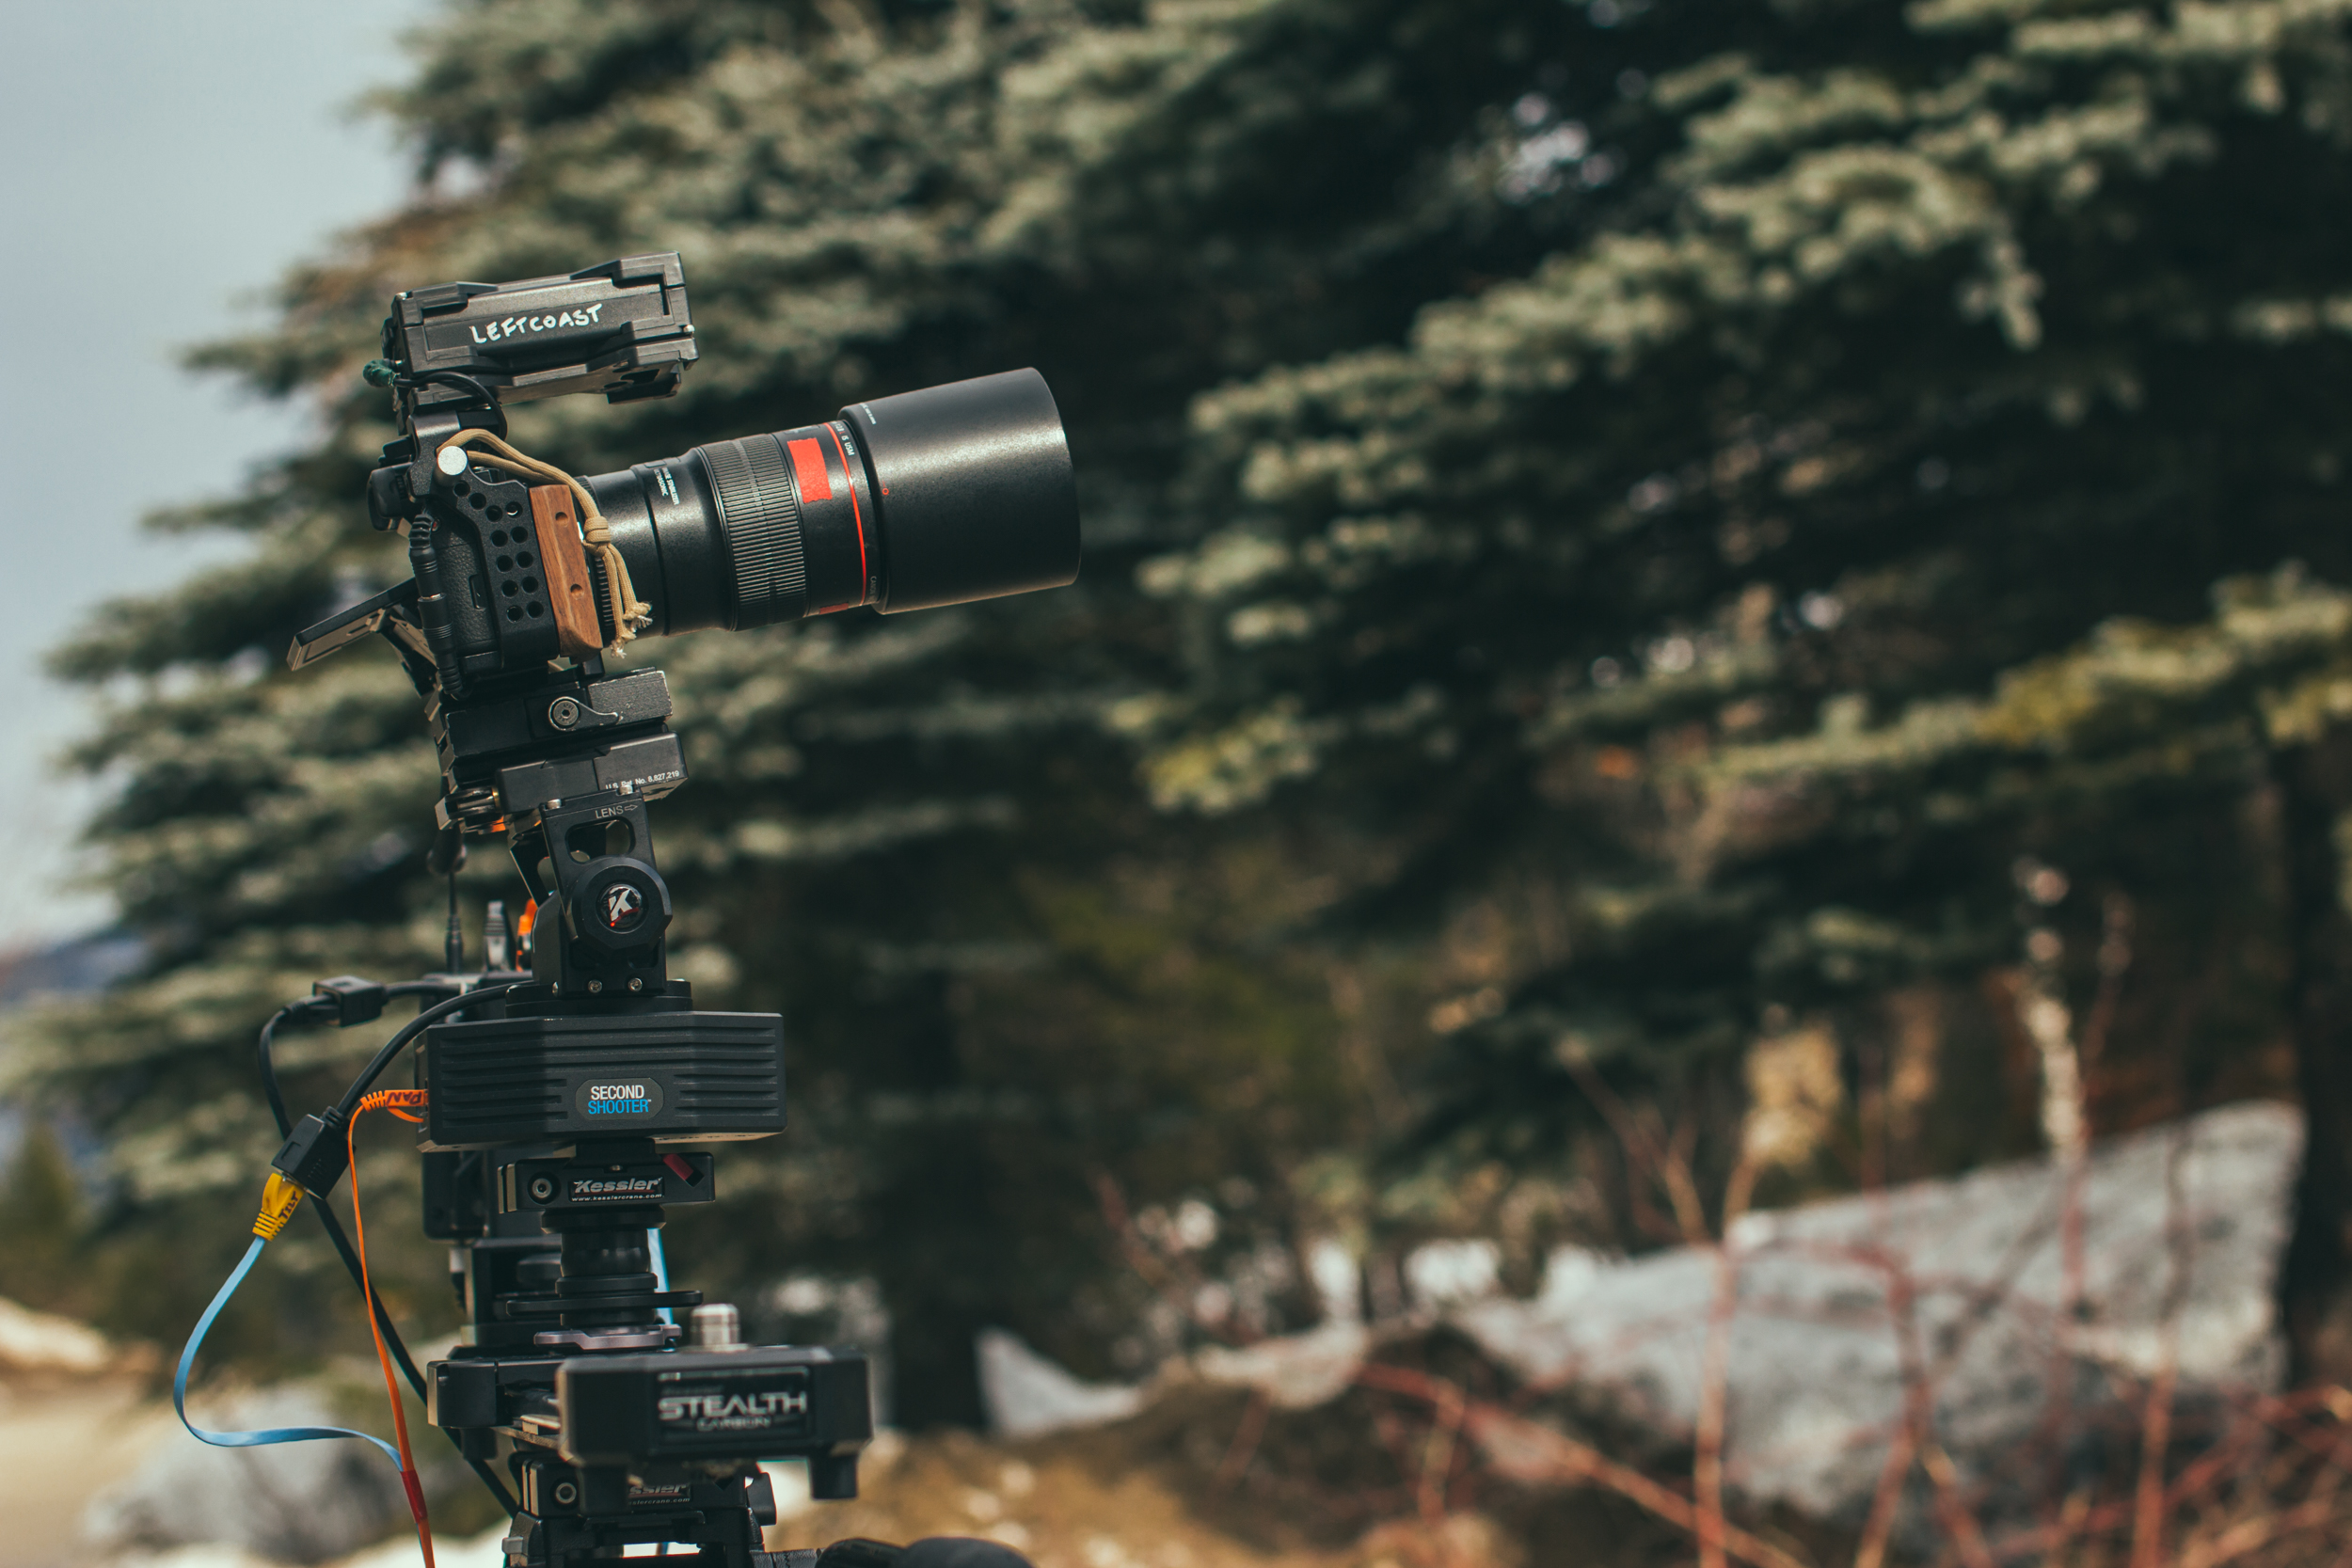
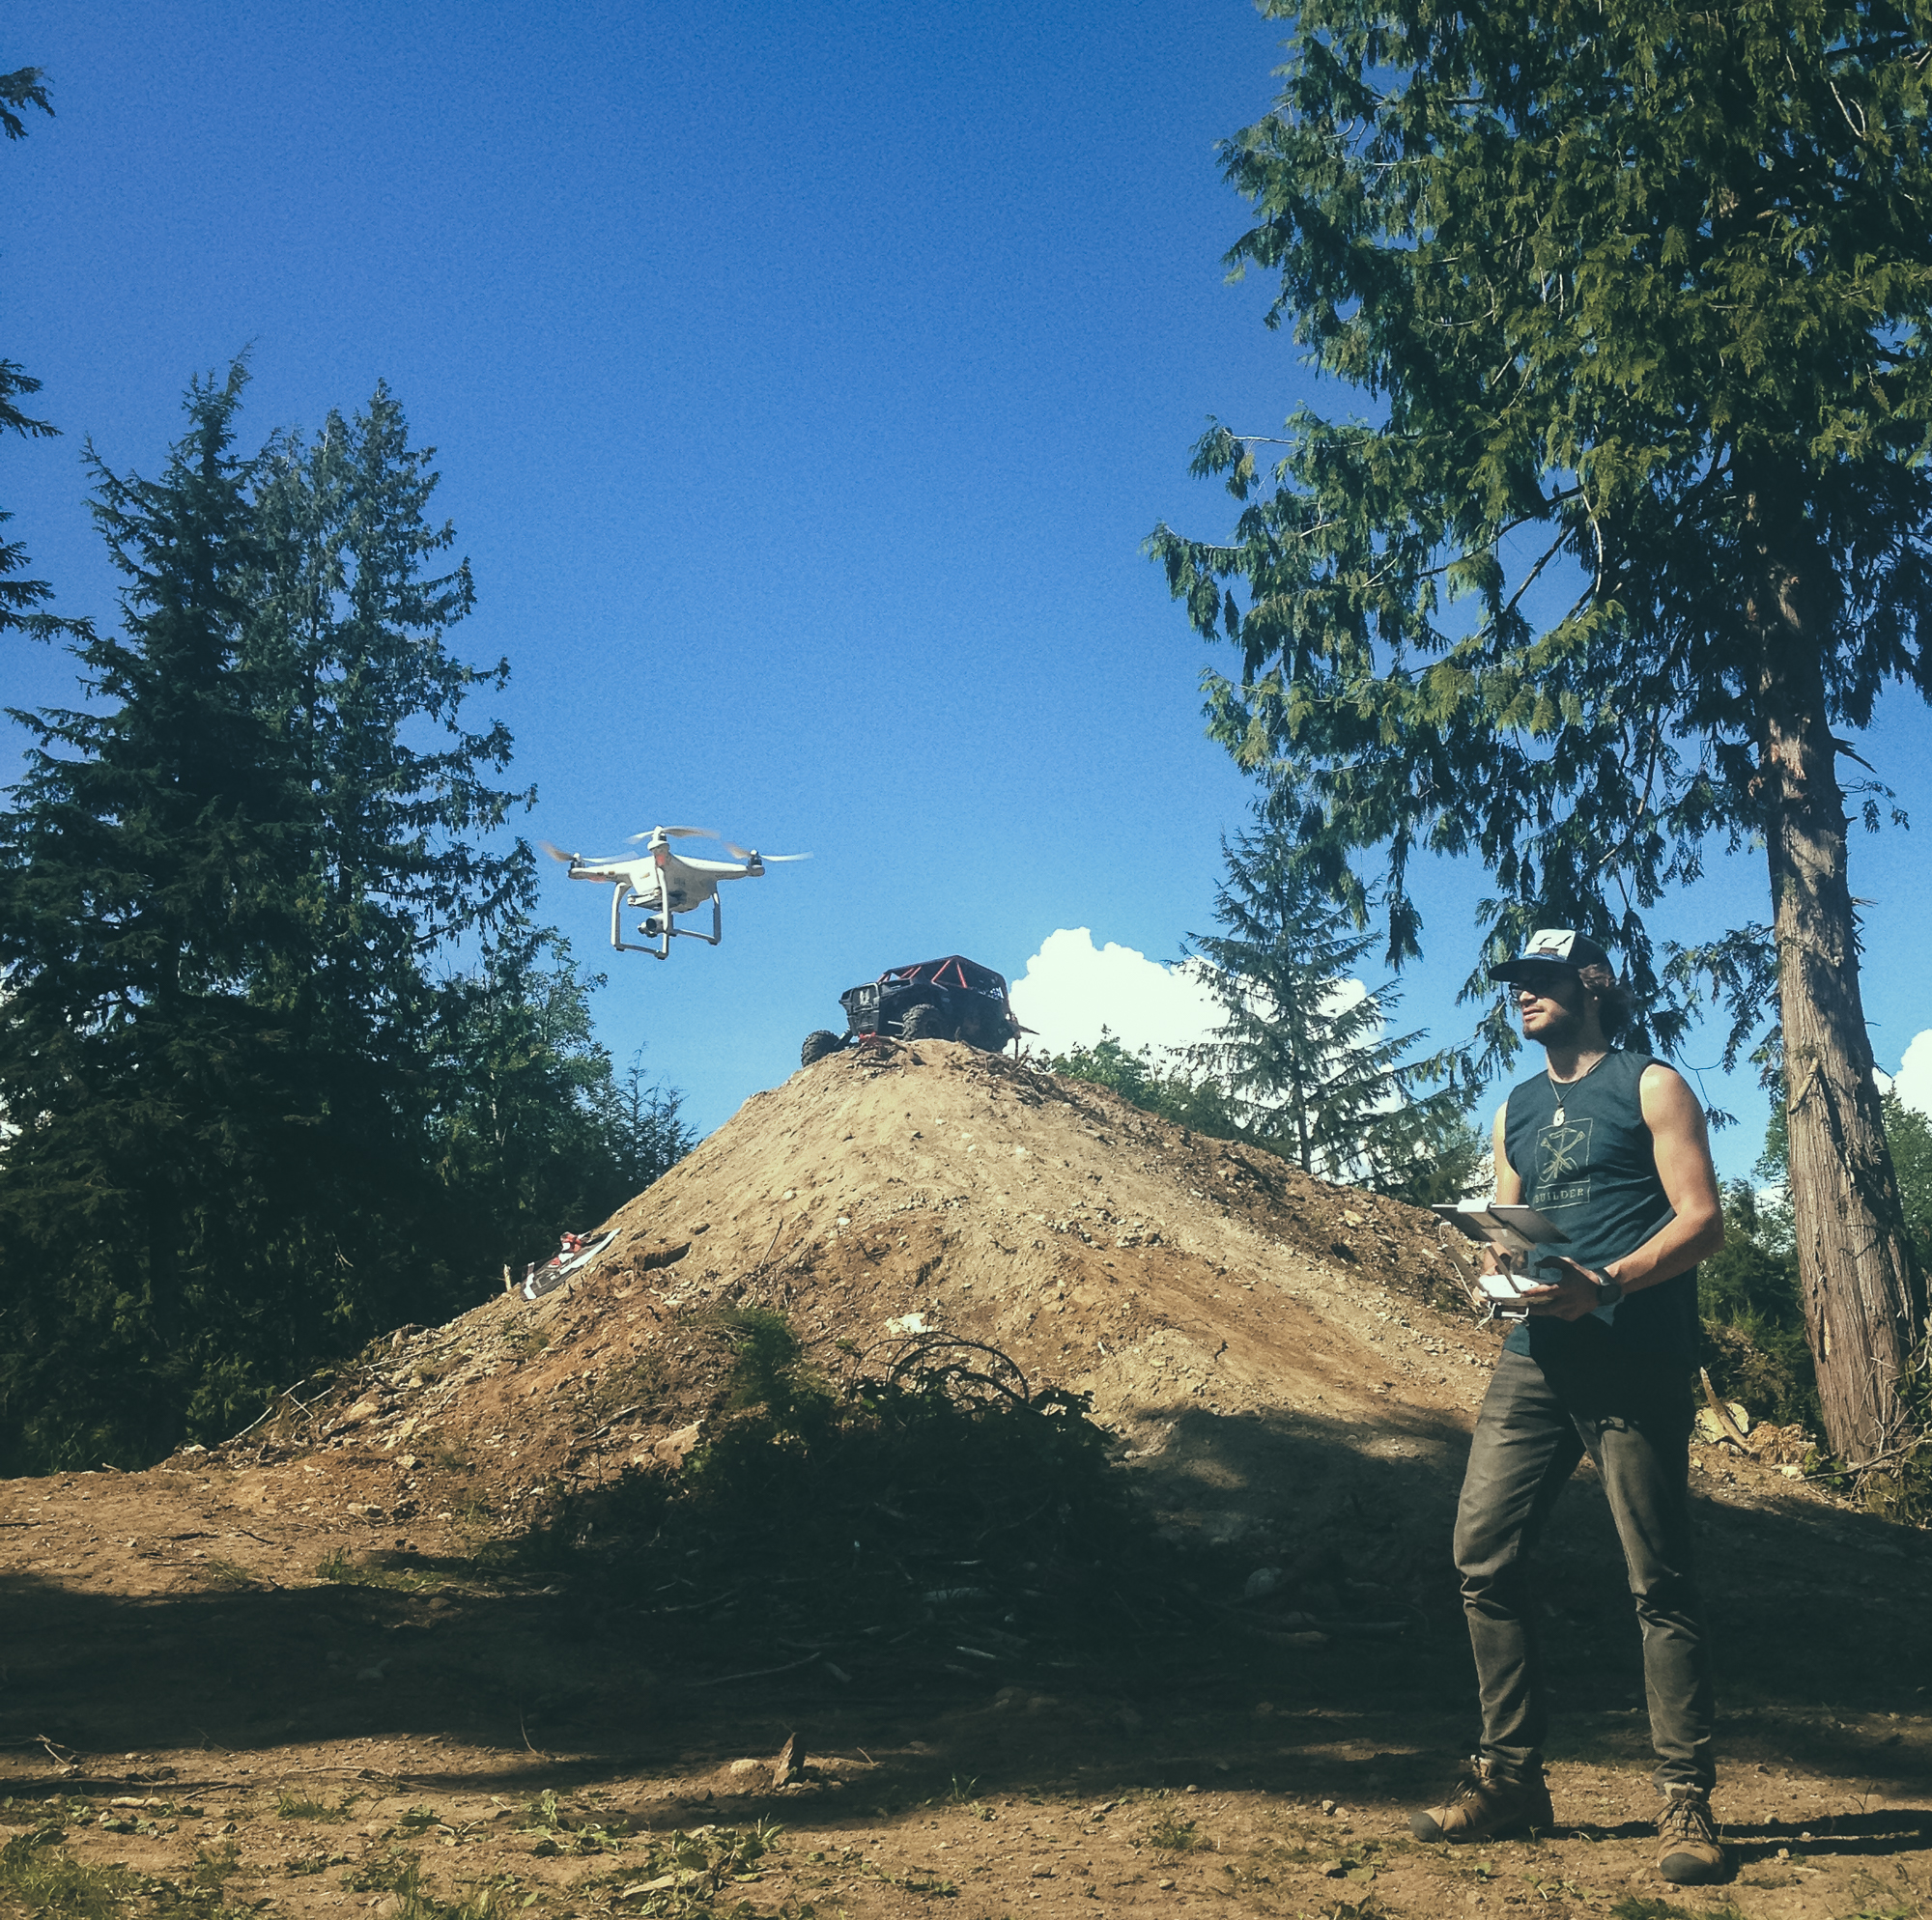
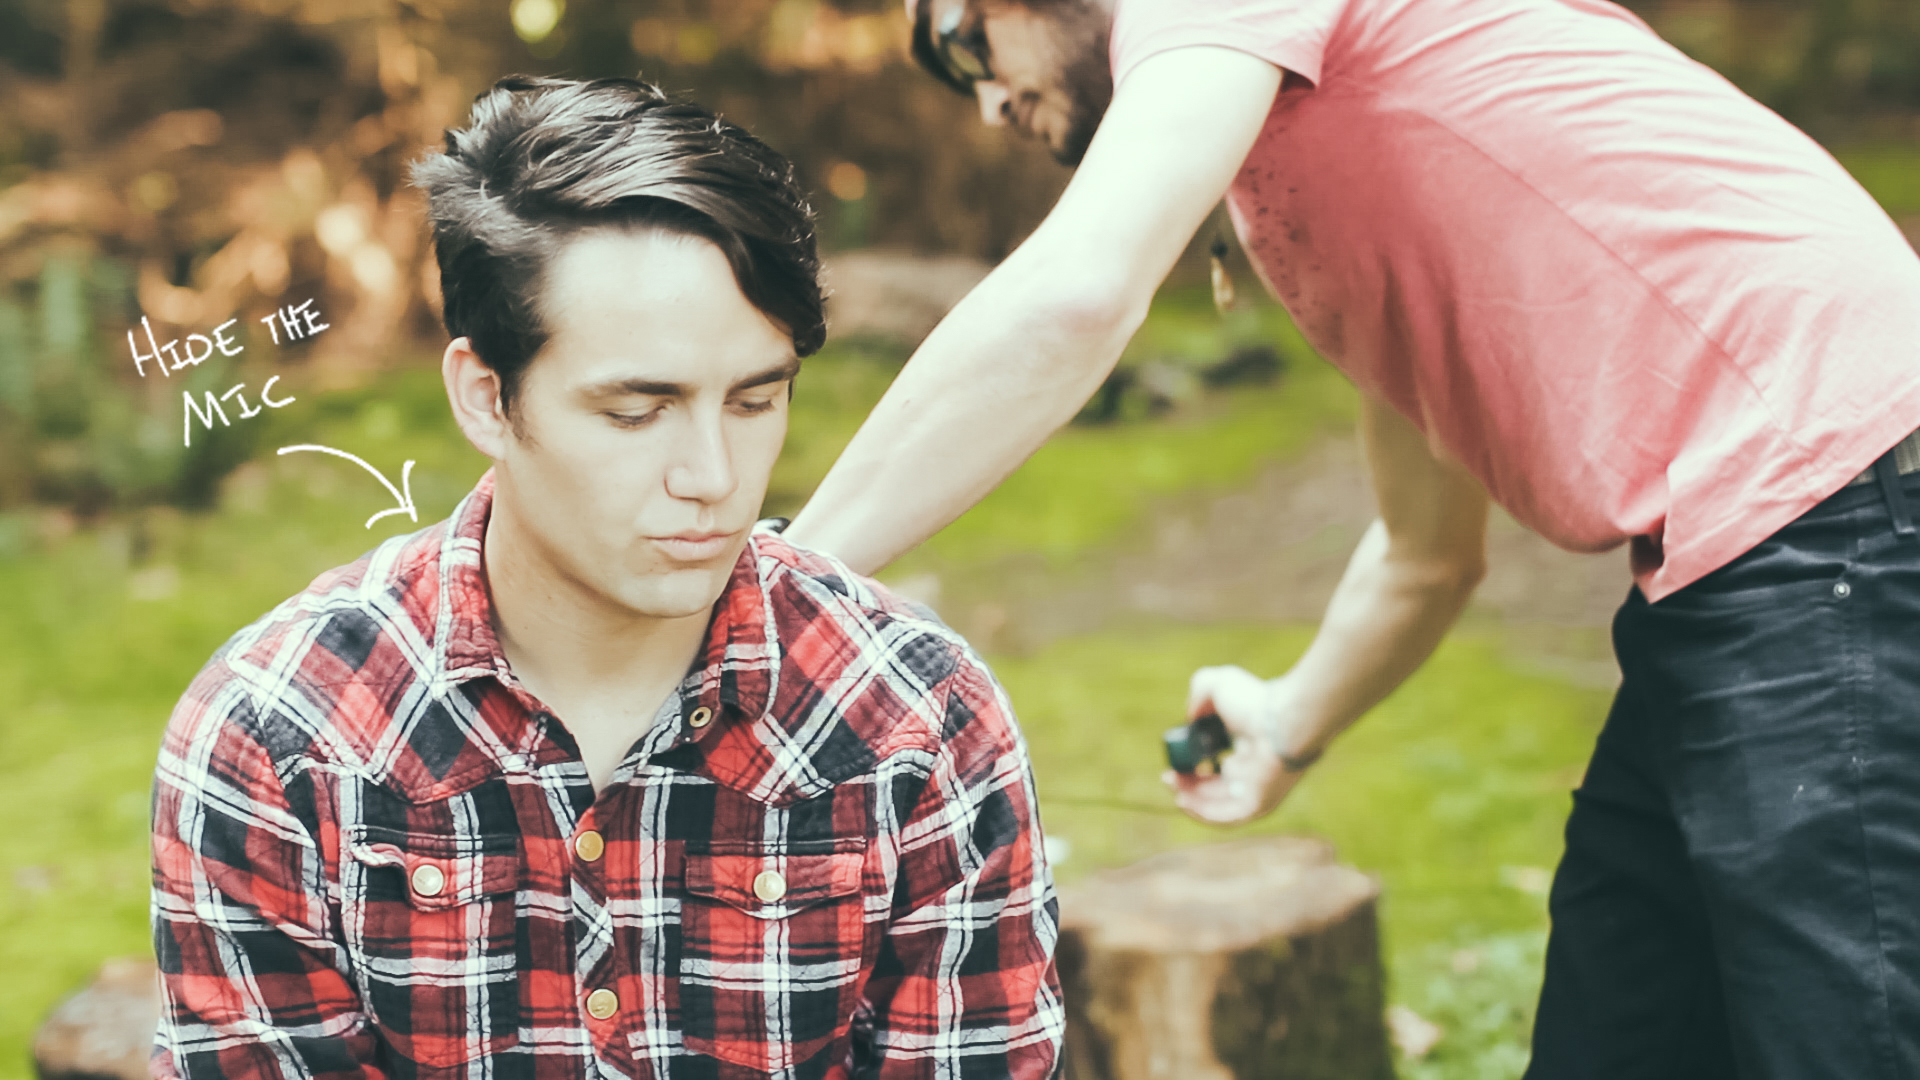
Do not Use Your Gear as a Crutch

Having great tools is fantastic, but they certainly aren't going to make the story for you. I am fully confident we could have shot this event with our iPhones and still told an intriguing story. Sometimes you can get so caught up in trying to use fancy gear on the day of that you actual miss a lot of the important details. On the flip side, far to often I hear people say that they can't create good videos until they have *insert dream piece of gear* to shoot with. This is simply not true.

LIMITATIONS CREATE EXCELLENT OPPORTUNITIES

When you have limitations it actually forces you to focus instead of paralyzing you with options.

Go with the Flow, Capture Life as it Happens.

Seriously, just run with it. Document things as they happen and try not to stress to much. You will make mistakes. You will miss some fantastic moments. But if you work hard you will also capture some of those beautiful moments that no one could have planned for. Sometimes when you are shooting it can feel like every single person in your vicinity is looking at you. When I first started shooting events I found this oddly uncomfortable. For some people it can be even worse and they will feel like they should shoot at all. Here is the truth. People are not thinking about you or judging you as much as you feel.

That is the reality and you have to keep telling yourself that. Yes there is the occasional jerk, but most people won't give a passing thought to you and your filming. Of anything they will just find it interesting and then move on with their day. Don't let what you feel others could be thinking prevent you from shooting boldly. Who cares if it looks like your too 'into it.'  Get the shots you need and try your best not to worry about other people. This is were there is a big benefit to shooting with a simple camera system. The more gear you add and the more fancy you look the more attention it will draw. You can use a really small get and get fantastic results without drawing much attention.

I truly do hope this gives you some ideas for your next event shoot. Remember, try your best to focus in on a story element that can help pull the whole thing together. I would love to see the results of your efforts. Tweet at me @theLeviAllen and I would love to see what you are making.

Remember,

Life's better when you make stuff.

book cover

Download Free Guide

I have made this guide available to all current and future subscribers of the Leftcoast Collective. If you would like to receive a copy of it directly join the Leftcoast Collective bellow. I will continue to send free great content every Thursday and you can unsubscribe at any time. [yks-mailchimp-list id="e34efe9754" submit_text="SEND ME THE FREE EBOOK!"]

Written by: Levi Allen VanderKwaak

Levi Allen

How to Get Fantastic Interview LAV Audio on the Cheap

LAVAUDIO.jpg

LET'S FACE IT, GETTING GOOD AUDIO WHEN YOU ARE STARTING OUT CAN BE AN EXTREMELY DAUNTING TASK. I AM GOING TO SHOW YOU A TIP SHOWN TO ME WHEN I WAS JUST STARTING OUT. GETTING YOUR FIRST LAV MIC DOESN'T NEED TO BREAK THE BANK AND CAN STILL GET FANTASTIC RESULTS IN MANY AREAS OF APPLICATION.

I first learned this out of necessity when I had my first wedding to shoot, but now I use it all the time for all sorts of applications. The trick is fairly straightforward and not terribly innovative, but the results are fantastic.

GreatInterviewSound_Leftcoast_May2015_00006

INSTEAD OF INVESTING IN AN ENTIRE WIRELESS MICROPHONE SYSTEM, INVEST IN A SMALL RECORDER TO PUT IN SOMEONES POCKET AND A WIRED LAV MIC. SKIP WIRELESS ALTOGETHER.

That's the magical combination right there. The best audio you are going to get of someone talking is through a shotgun microphone, but the second best option is a LAV mic directly mounted to the subject. Adding this to your production arsenal brings up the quality immensely. If you are going to have any video with talking in it you need to get that audio as best as you can.  Eliminate the need for a wireless setup and simultaneously cut down your audio equipment costs exponentially. The principle of using a wired lav with an audio recorder can be applied to many different makes of equipment (rode even makes a mic that plugs into your phone), but I am going to recommend the setup I use. I am going to recommend it because I trust it and I know that it works.

1) ZOOM H1 Audio Recorder

2) GIANT SQUID AUDIO OMNIDIRECTIONAL LAV MIC (You can also buy directly from his site. If you buy from his site you can get a better quality right angle connector which is what I opted for. )

All said and done, the gear comes in at less than 149$ which is fantastic.

This film is an example of using this mic setup in a real life situation.

GreatInterviewSound_Leftcoast_May2015_00014

So you've ordered in your setup, now what?

Here are some tips that will help your first LAV experiences go a lot smoother.

  • Set the recording mode to WAV instead of MP3. That way you get more flexibility to EQ in post. (you can turn on lo-cut if you would like.
  • For setting the audio gain level most often it's best to go manual. Get the subject talking to you in a normal talking voice and try set it so the average amount of their talking is hitting at least -12 on your meters. This is tough because sometimes if they laugh or get to loud it will peak, so you need to be careful.
  • I sometimes set the mic to automatic. I've done this in a wedding ceremony when the mic was on the officiate. It auto leveled when he was talking, but then it would boost the levels and pic up the bride when she was talking.
  • I ran two of these LAV setups when shooting weddings (I only shot two). One on the groom and the other on the officiate.
  • For placement I try place the mic close to the collar but in a position that it won't scratch and rub if the person is going to move. Personally I don't mind if the mic is slightly visible in the shoot. Getting the good audio is worth it to me.
  • If you are shooting a talking head video or an interview, I try get the subject to clap their hands when both the camera and audio are rolling so it eases syncing later in post (i'll get to that in a moment.)
  • When you are done put the audio recorder into their pocket and flip the switch to hold once you have hit record. This way non of the buttons get pressed accidentally.
DOUBLE CHECK THAT IT IS RECORDING!!!

It only takes forgetting once to realize how important this is. Even when you are certain you have hit record, double check. So much better to be safe than sorry.

WHAT TO DO IN POST

By using this method you will inevitably end up with a separate audio file and separate video file. Make sure you get your cameras mic loud enough even though you won't use it, because you need this audio to sync the video and audio together. If you had the subject clap, just line up the clap and you are good to go. If not you might need to begin the tedious process of manually lining it up. Investing in Plural Eyes is a great option because it does a great job os syncing your audio for you.

I hope this setup helps you. I love it and continually use it to this day. It is so handy to be able to put a mic on a subject and have it rolling all day. If you have any questions or if things were unclear, join the Leftcoast Collective for free in order to email me directly, or reach out to me on twitter.

Remember, life's better when you make stuff.

Written by: Levi Allen VanderKwaak

How to Craft Real Stories with Great Interviews: Featuring the Kaléo 2015 Film

https://vimeo.com/127073088 This week I got asked a question from Alyssa, "Levi, I am just starting out with filmmaking and I wanted to learn how to conduct interviews, could you share some of your tips?"

I just created a film that was heavily driven by interviews (as seen above).  I thought it would be an excellent opportunity use this piece as a case study of sorts as I talk about my interview process. My goal in this post is to teach you how to go about creating better interviews for your next film! First I will share my approach to interviews, and then share some behind the scenes info on this Kaleo film.

How to Craft Real Life Stories with Great Interviews

This post is going to help you learn how to capture better real life stories. I am going to push into an important component of how I approach storytelling, getting great interviews with ordinary people.

Interviews as the Backbone of Story

The filmmaking style I am developing definitely relies heavily on using interviews to convey the story. In most cases I find that I am interviewing people who have sometimes never been on camera before in their entire life. But I have learned a few tricks to make the whole process a lot more natural and comfortable for everyone involved.

Once I have captured the interview I eventually end up cutting out the main best bits of their talking and using this audio drive a visual story. I don't include the audio of my questions being asked, I only use the visual and audio of the subject.

The Preparation

The nature of the interviews I normally conduct, do not allow for a whole lot of pre-production. If you are interviewing a public figure or an artist, you need to do your homework and study up on the subject. Yet most of the time you might be interviewing someone who has nothing about them on the internet. In this case there is not much that you will have prepared going into the interview. What I normally do for every interview anyhow, is sit down on my own before hand with a piece of paper and sketch down some thoughts or ideas I would like to cover. I don't use this as a formula I have to follow, rather just as an idea sheet for those moments in the interview where I feel stuck and don't know where to go. I find this small bit of prep helps a lot and makes me feel a lot less panicked about what I need to cover.

Learn About the Subject

Do you know much about subject you are going to be talking about with the person? If not you should definitely spend some time learning about the subject, are you going to talk about this persons massive Star Wars collection? Well then, you should probably know a thing or two ahead of time about Star Wars.

Chose a Location that is Distraction Free and Comfortable

Your goal as the interviewer is to get your subject into the most comfortable and natural state as possible. You want to get them talking as if  they were in a conversation with an age-old friend. This is hard to do in a location with lots of distractions or unwanted interruptions. I ask them to sit on the edge of the chair so they their body position naturally seems more interested in what they are talking about. This way they don't slouch their shoulders and lean back in the chair as well.

The Technical Gear

This could be an entire post in and of itself, but I will give a few tips that I use. When setting up your angle, try to have the camera at eye level with the subject or a little bit above. My goal with angles and lens choice, is to make it feel as if the viewer is sitting there with the subject. Use good composition and have the subject look slightly to either side of the camera. Having them look to the long side of the frame (as shown bellow) helps create a far more natural feel. You can get stylistic here if you are trying to convey a certain feeling, but this is usually my starting place with single camera interviews.

Don't Slack on the Audio

The biggest part of what will drive this interview is good clear audio. I use a wired lav connected to a Zoom H1 to  record my audio. It is strongly recommended to have two sources of audio such as a shotgun mic and Lav, but I currently have not invested in this. When setting audio levels I usually tend to get a conversation going with the subject trying to make them feel comfortable. I don't even let them know I am setting levels, I just try get them to talk about themselves or where they are from. While they are talking try set your levels and leave a little room so if they get excited it won't peak the audio


The Most Important Part: The Interview Itself

In order to conduct a great interview, you need to be a well-practiced conversationalist. This is by far the most important part of getting consistent results from a wide variety of people. Your goal is to get them comfortable and forget entirely that they are on camera. Most people are super nervous about the whole process and the quicker you can get them comfortable, the quicker you are going to start getting the audio bits you actually want to use. When first sitting down I tend to explain how the interview process will go, "It's going to be just like a conversation, don't worry about the camera, you can talk directly to me." I sometimes explain as well that I would like to have them include the question in their answer. For example, Q: "How do you like being interviewed?" A: "I really enjoy being interviewed."

Instead of

Q: "How do you like being interviewed?" A: "I really enjoy it."

You must be a fantastic listener

Once the interview starts and the technical components are rolling, your full-time job is being a fantastic listener. You need to make them feel as though you care immensely about what they are saying. You need to ask great questions that build off what they just said. You should ask questions that make them think, "Man i've never thought about that before."

The moment you look down at your paper for your next question, you have pretty much lost them.

This is so challenging, but you need to keep eye contact with them and avoid being distracted yourself. You can look at your questions from time-to-time, but if the interviewer starts to feel like you are following a script, you will get results as if you were following a script; forced and unnatural.

Editing Together your Interviews in Post

This step is incredibly important as well. Important enough that I decided to make an entire blog post about it next week. If you are not apart of the Leftcoast Collective already I strongly recommend getting on board so you can find out when my latest posts are released, you also get a free ebook which is pretty cool.

Some Behind the Scenes Info For the Kaléo Film

The Purpose of the film: This is a film that I created to document and share the story of an eight month leadership program on Vancouver island. This piece was driven by interviews that I conducted with ordinary people who had never been in front of a camera before. The format is a little long as it was not necessarily made to be viewed online.

The Filming Process: I gathered my footage throughout the year whenever I had the chance. My primary job was as a leader on the trips, so filming definitely was not a priority. For this reason my kit was usually really light. I rocked a top loading Tamrac bag so I could pull out a camera at any time and film. Using the Rode Video Mic Pro for Audio I shot primarily handheld or with my homemade stabilizer using mostly the Tokina 11-16 or my Rokinon 35mm f1.4

The interview shots were all done with my sigma 50mm 1.4

The Editing: I edited this piece in the few days coming up before their graduation. From the start of the editing to the time it was screened, I had just under a total of  36 hours. I cut all the interview selects, and then started to piece together a storyline. Then I went through and cut all my favourite BRoll and started adding that in over top.

The Grading: I only invested about an hour into grading as that was the only time I had. I did a basic color grade through lightroom using VSCO. I am not to happy with a few of the shots, but most of it turned out just fine.

All in all the project was heaps of fun. I always wish I had more time to edit, but It was literally right down to the deadline on this one. I literal just finished encoding the project 5 minutes before the grad ceremony started.

Woah, this ended up being a bit of a wordy post. I hope you got some value from it. As always if you have any questions connect with my on social media, or join the Leftcoast Collective and send me an email directly!

book cover

Download Free Guide

I have made this guide available to all current and future subscribers of the Leftcoast Collective. If you would like to receive a copy of it directly join the Leftcoast Collective bellow. I will continue to send free great content every Thursday and you can unsubscribe at any time. [yks-mailchimp-list id="e34efe9754" submit_text="SEND ME THE FREE EBOOK!"]


Written by: Levi Allen

Levi Allen