


LET'S FACE IT, GETTING GOOD AUDIO WHEN YOU ARE STARTING OUT CAN BE AN EXTREMELY DAUNTING TASK. I AM GOING TO SHOW YOU A TIP SHOWN TO ME WHEN I WAS JUST STARTING OUT. GETTING YOUR FIRST LAV MIC DOESN'T NEED TO BREAK THE BANK AND CAN STILL GET FANTASTIC RESULTS IN MANY AREAS OF APPLICATION.
I first learned this out of necessity when I had my first wedding to shoot, but now I use it all the time for all sorts of applications. The trick is fairly straightforward and not terribly innovative, but the results are fantastic.

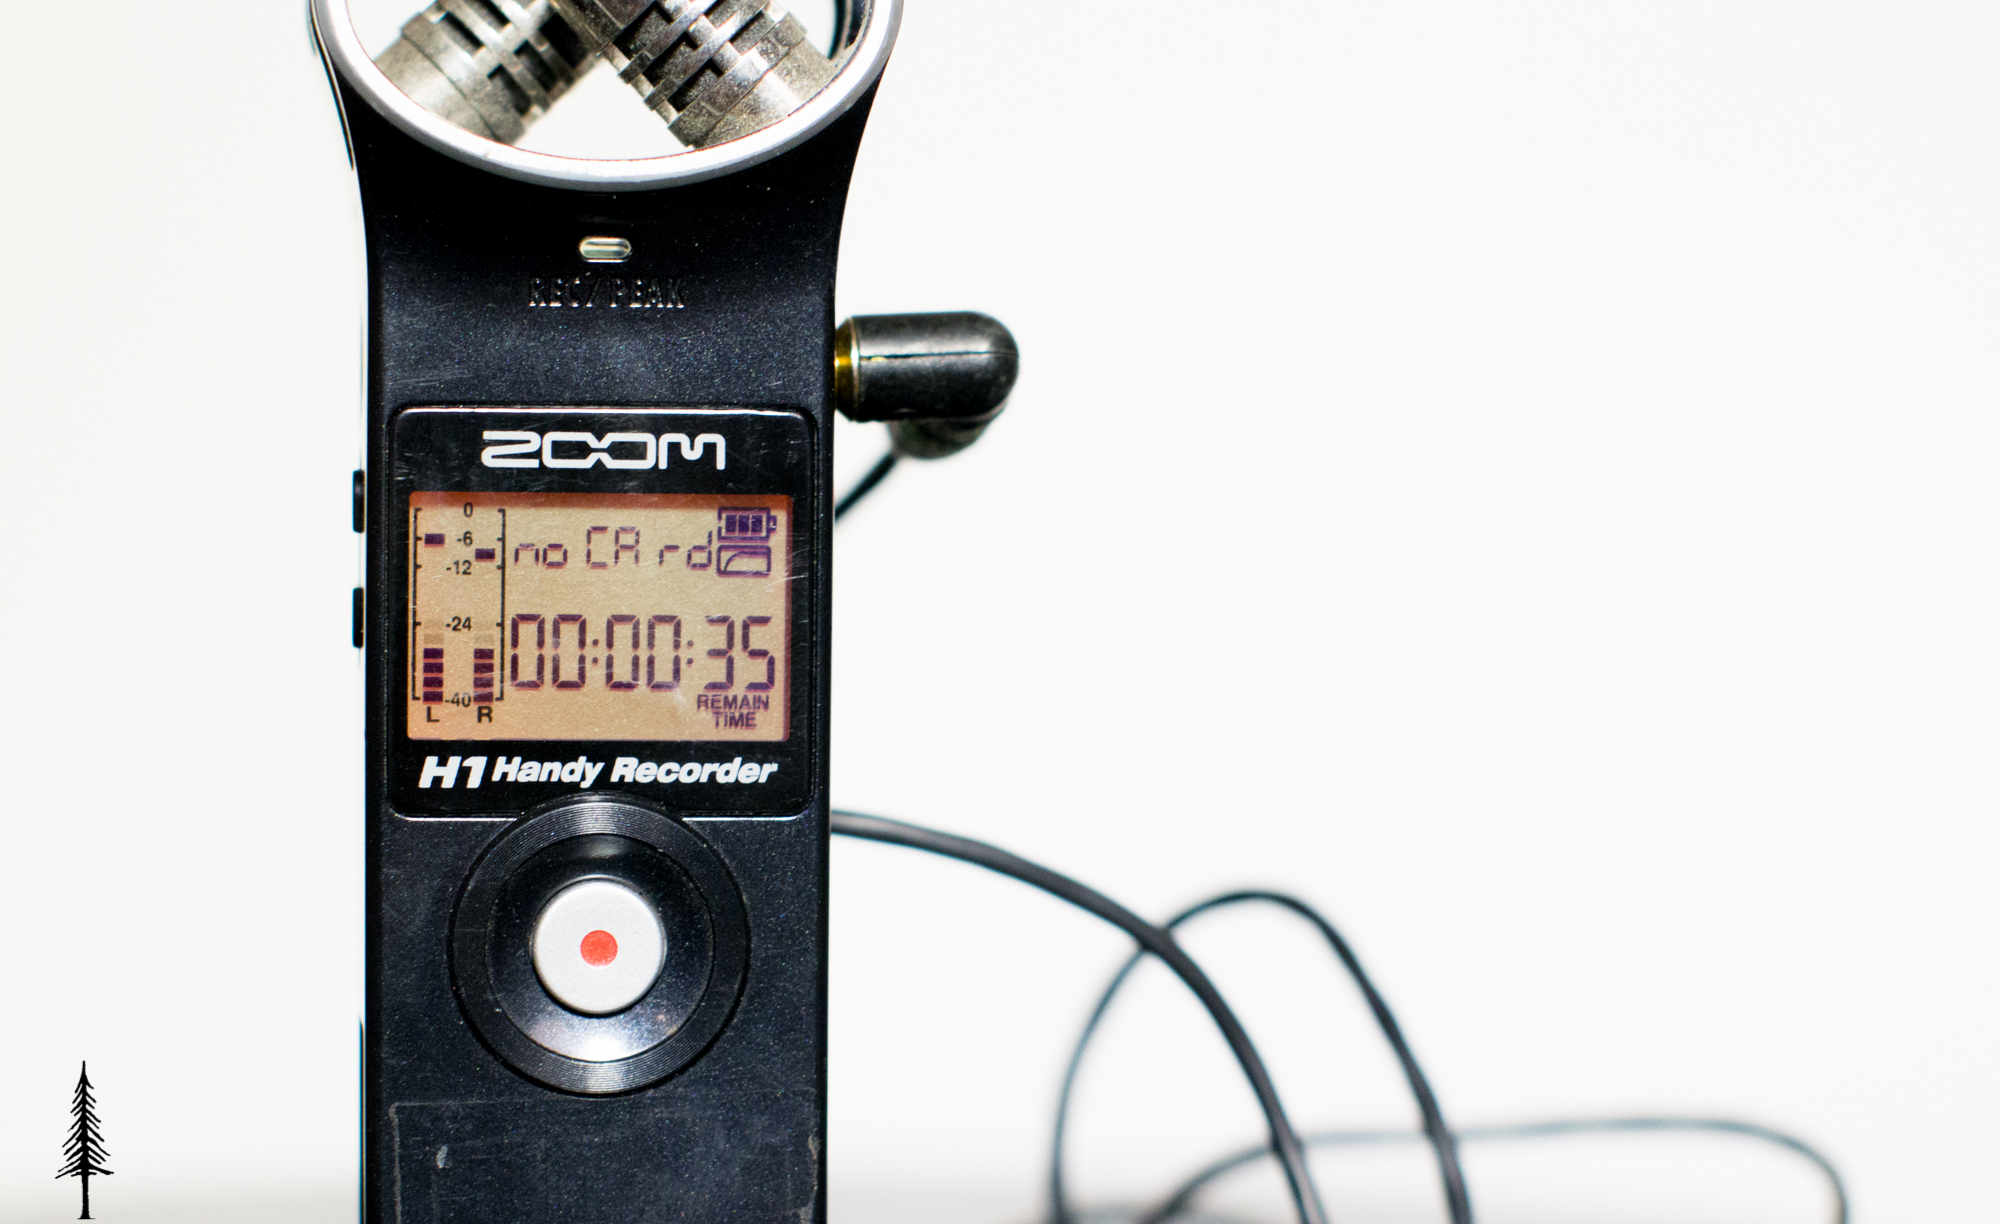
INSTEAD OF INVESTING IN AN ENTIRE WIRELESS MICROPHONE SYSTEM, INVEST IN A SMALL RECORDER TO PUT IN SOMEONES POCKET AND A WIRED LAV MIC. SKIP WIRELESS ALTOGETHER.
That's the magical combination right there. The best audio you are going to get of someone talking is through a shotgun microphone, but the second best option is a LAV mic directly mounted to the subject. Adding this to your production arsenal brings up the quality immensely. If you are going to have any video with talking in it you need to get that audio as best as you can. Eliminate the need for a wireless setup and simultaneously cut down your audio equipment costs exponentially. The principle of using a wired lav with an audio recorder can be applied to many different makes of equipment (rode even makes a mic that plugs into your phone), but I am going to recommend the setup I use. I am going to recommend it because I trust it and I know that it works.
2) GIANT SQUID AUDIO OMNIDIRECTIONAL LAV MIC (You can also buy directly from his site. If you buy from his site you can get a better quality right angle connector which is what I opted for. )
All said and done, the gear comes in at less than 149$ which is fantastic.
This film is an example of using this mic setup in a real life situation.
So you've ordered in your setup, now what?
Here are some tips that will help your first LAV experiences go a lot smoother.
- Set the recording mode to WAV instead of MP3. That way you get more flexibility to EQ in post. (you can turn on lo-cut if you would like.
- For setting the audio gain level most often it's best to go manual. Get the subject talking to you in a normal talking voice and try set it so the average amount of their talking is hitting at least -12 on your meters. This is tough because sometimes if they laugh or get to loud it will peak, so you need to be careful.
- I sometimes set the mic to automatic. I've done this in a wedding ceremony when the mic was on the officiate. It auto leveled when he was talking, but then it would boost the levels and pic up the bride when she was talking.
- I ran two of these LAV setups when shooting weddings (I only shot two). One on the groom and the other on the officiate.
- For placement I try place the mic close to the collar but in a position that it won't scratch and rub if the person is going to move. Personally I don't mind if the mic is slightly visible in the shoot. Getting the good audio is worth it to me.
- If you are shooting a talking head video or an interview, I try get the subject to clap their hands when both the camera and audio are rolling so it eases syncing later in post (i'll get to that in a moment.)
- When you are done put the audio recorder into their pocket and flip the switch to hold once you have hit record. This way non of the buttons get pressed accidentally.
DOUBLE CHECK THAT IT IS RECORDING!!!
It only takes forgetting once to realize how important this is. Even when you are certain you have hit record, double check. So much better to be safe than sorry.
WHAT TO DO IN POST
By using this method you will inevitably end up with a separate audio file and separate video file. Make sure you get your cameras mic loud enough even though you won't use it, because you need this audio to sync the video and audio together. If you had the subject clap, just line up the clap and you are good to go. If not you might need to begin the tedious process of manually lining it up. Investing in Plural Eyes is a great option because it does a great job os syncing your audio for you.
I hope this setup helps you. I love it and continually use it to this day. It is so handy to be able to put a mic on a subject and have it rolling all day. If you have any questions or if things were unclear, join the Leftcoast Collective for free in order to email me directly, or reach out to me on twitter.
Remember, life's better when you make stuff.
Written by: Levi Allen VanderKwaak
