The First Tool You Should Buy For Camera Support

Today we are going to look at the best piece of camera support equipment on the market for adventure filmmakers. Or any filmmakers for that matter. 

DSC05992.jpg

As indie filmmakers we should always be looking for gear investments that have the highest possible ratio of cost vs. results. With that in mind, the tool I am recommending is not a 3 axis gimbal, it’s not a drone, it’s actually just a plain old tried-and-true monopod. You’ve probably seen one of these before, and maybe you’ve thought, hey that works for that wedding guy, but I prefer my tools a little more high tech or pro looking. Don’t think of yourself as too good for the monopod. I am going to show you why this tool can help move the needle the most on achieving cinematic results for the lowest upfront investment.

DSC05996.jpg

I think this tool will be the fastest tool to help you develop your cinematic eye.

A monopod allows you to be more mobile and flexible than almost any other tool. It is the fastest way to cover many different perspectives of a scenario and then decide which ones you like the most. I’ve seen people who started out by purchasing a tripod and a slider. Then they mount their slider to the tripod and try to shoot from that the entire time. In the edit room they are trying to decide what to do with all these shots that just slide left to right from the same perspective. That’s because in a way the visual aspects of filmmaking is like good writing. You need to use varied words and expressions in order to create a pleasant cinematic experience. You can’t add an exclamation point on the end of every sentence and call it engaging writing. The same goes with filmmaking. Camera movements should be used intentionally, and a monopod helps you learn the foundations of these principles.

DSC06001.jpg

The Best Monopod Out There

Simply without question Sirui is making the best monopods on the market. The model I recommend is the Carbon Four Section Monopod from Sirui. If you would like to save some money you can go with the the Aluminum Four Section Version. I really do recommend the weight savings of the CX version though.


You are also going to need a fluid head of some kind

I like the heads from Manfrotto, but literally any brand of fluid head will do the trick.

DSC06005.jpg

The Official Soundtrack of Untethered

TheScoreOfUntethered

The Important Auditory Landscape of Filmmaking

There is something very special that happens the experience of watching a film is exploring both new visual and sound landscapes. The combination of new music and visuals that match can create a powerful experience for the audience. When thinking of some of my favorite films, all of them had powerful musical scores to complement the amazing stories. You might not believe it, but I spent more money on music licensing than any other area of the film.

A conversation between me and a filmmaking buddy.

This is message I sent to my good friend Scott (Director behind BUILDER). His response is an adequate representation of how most filmmakers feel after enduring the painful process of sifting through hundreds of songs for a film. My journey of finding music was no different, and in this post I am going to share some of the different methods you can go for adding music to your film, and also share the much requested song list from Untethered.

 “WHAT SONG IS THIS?!”

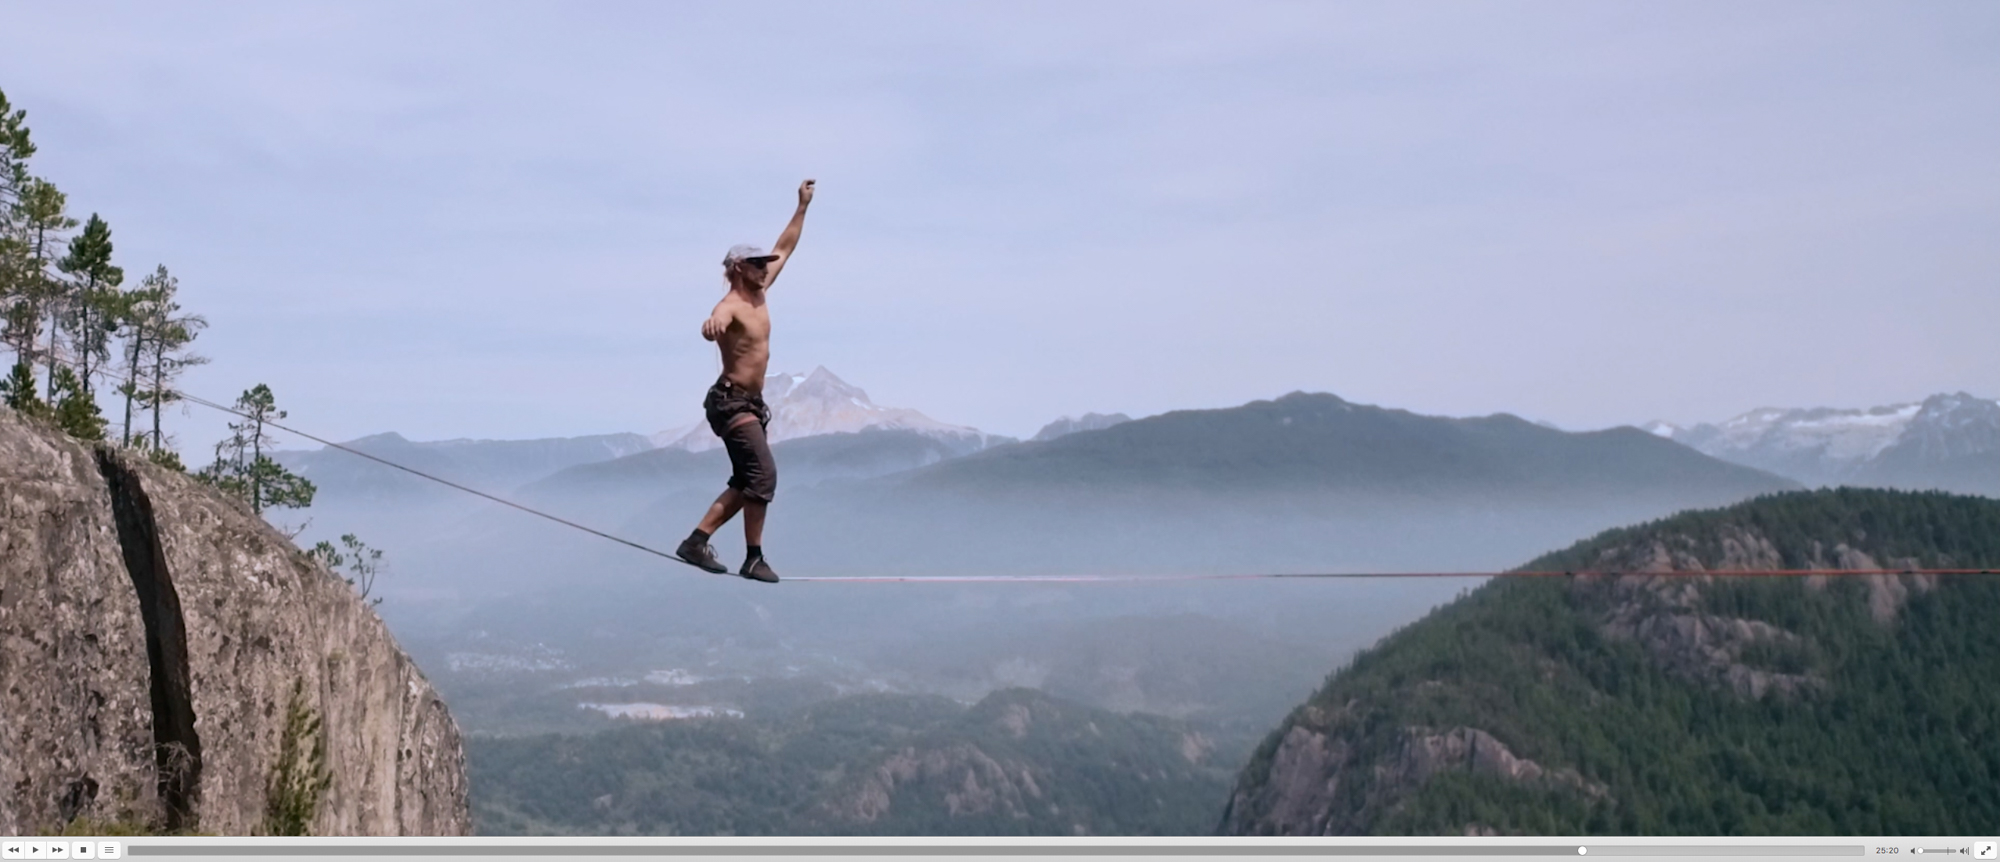
People asked me that after watching UNTETHERED far more often I expected them too. That makes me super excited, I really connect with music, and I am really stoked that there are people connecting with the music I chose to have in the film. Here is a full track list and links to purchase the songs!

https://www.youtube.com/playlist?list=PLDfEIhbFizIT9YOcI4dJiC2zBu7gVvap5

While reading this blog post I suggest clicking play on the playlist I created above sharing the songs from Untethered (the ones that are on youtube that is).

Official Soundtrack of Untethered

No Other Name - Ryan Taubert

00:10 - WaterFall Rope Swing Intro

Five Families - Ryan Taubert

1:53 - Park Slacklining

Place From Where I Fell - Instrumental - Elenowen

3:08 - Heading Up The Chief

Arrows Fly - Afterlife Parade

8:13 - The Art of Highlining

The Touch - Welshly Arms

11:53 - Rest Days at the Lake

Make A Little Money - Royal Deluxe

14:46 - The Line Gets Rigged

Halation - evolv

17:27 -  Slacklining has Changed Me

Oh God, What We've Become - Instrumental - The Soldier Story

19:06 Wait He Does This Without a Harness

Silence

20:26 - First Free Solo Walk

I'm Gonna Do My Thing - Royal Deluxe

21:53 - I Just Started Doing My Thing

Silence

24:15 -  First Free Solo Walk

Can't Stop The Avalanche -The Soldier Story

26.20 - World Record Celebration

Love in a Minor Key - Welshly Arms

28:21 - Credits

The Hours Of Frustration are Worth IT

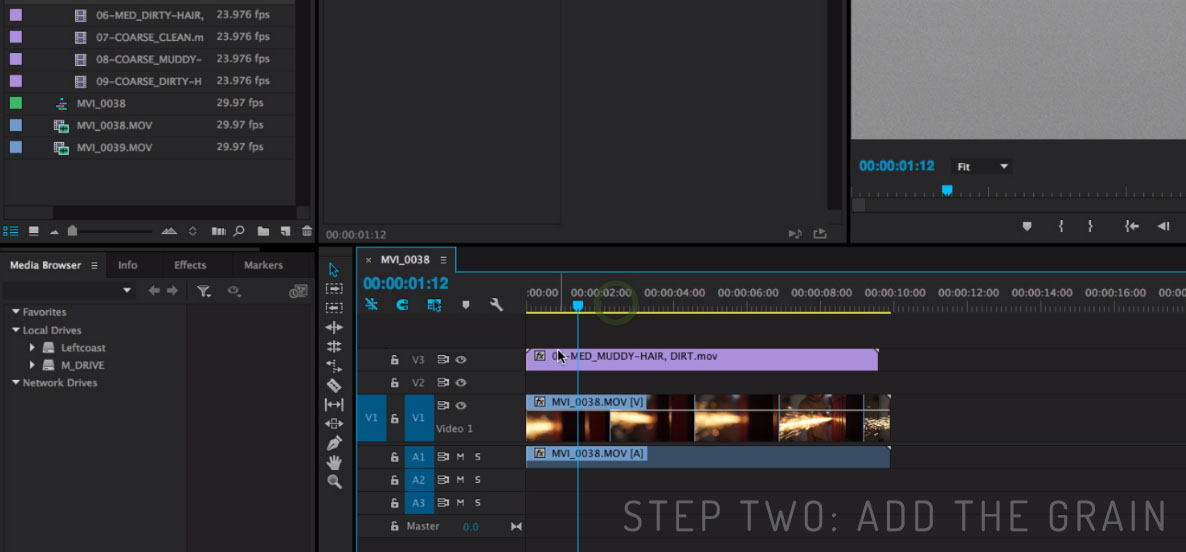
Having a music supervisor is something that I dream of. The amount of time spent searching for songs is often far more than you expect. The above 11 tracks are just the final tracks in the film. I ended up testing and almost using over 35 different tracks.

You should definitely think twice before just taking and using someones music without asking. Even if it’s a project you are doing for free. Would you like it if someone did that with your footage?

There are several methods you can chose from for how you are going to add music to your film. I am going to take this moment to talk about copyright and fair use. If someone downloaded one of my videos from youtube, added their own music and then proceeded to re-uploaded it to their account, I would have a problem with that. I wouldn’t feel good that someone had done that, especially without asking. At the very least I want someone to at least ask about using the visuals I put in hard work to create. In the same mindset it seems rather obvious to me that If that’s how I feel, I cannot go and do the same to other artists even if it’s on personal not for profit videos. That is the position I have reached on this topic of music borrowing. In the past videos you can see I did not always follow this principle, however in my vlogs and other videos I have now made it a huge priority to only ever use music with permission. To my understanding there are several methods content creators like myself can utilize when trying to get music properly for their films.  

  1. Hiring a Composer

This is not the route I chose, but this seems like the most ideal situation if you have a large music budget. Working directly with an artist to help bring a vision to life. Depending on the different workflows of artists you can often go back and forth on different ideas and then really hone in on a style and direction for the soundscape of the film. This route has massive benefits because it can allow the film as a whole to have a very holistic feel. I definitely want to use composers on future pieces, especially if they are in the sub 10 minute range.

  1. License Music from a Licensing Website

This is the method I ended up using for the film. There are several websites that exist to specifically hosts songs of artists and allow a license to be purchased. These websites can often be frustrating as it takes a while to find songs that aren’t already being used all over the internet. They also offer a great range of upgradeable licenses or different categories and prices for different types of uses.

  1. Fair Use Agreements with the Artist or Collaborators

If your film is a passion project it is totally okay to reach out to artists and ask about fair use. Some artists enjoy seeing their music getting used in work putting together by other people. At the same time, other artists definitely do not want you to do this, or will just put you through to their manager to arrange a license with their label. I did not do this route at all. I didnt want to endure the time consuming process of trying to email every single artist. They don’t always get back promplty and it can be very frustrating.

Getting a Real Band Feel

I really like the option of license sites like Music Bed. So often with some of other music licensing sites the songs can feel like they were made specifically for licensing purposes. They feel like they lack something special. As a musician myself, I really struggle with music that sounds like this in my films. Sometimes you can make these tracks work okay, but it starts to become really frustrating for me when the music seems to lack some sort of soul. That’s why I appreciate sites like Marmoset or Music Bed. They are sites that categorize from actual artists. A lot of these artists don’t just create music for licensing, they also release their own albums. I love that ‘real artist’ feel where songs have texture and life to them.

One of the issues that goes along with a licensing site is that you run the risk of the song having been in a piece that your viewer has already seen. That’s just part of the game. I tried my best to only use music I had personally not heard before. I don’t have ears and eyes in all corners of web video, but I did try to keep my ear open for these songs in videos that I had seen. There were two songs that I heard in other edits when I was already deep into the editing my film–I decided at that point that I was just going to have to be okay with it. There were a few other songs I found out were also part of OST’s for hollywood films. I had not seen the film before so I decided to just use it anyways.

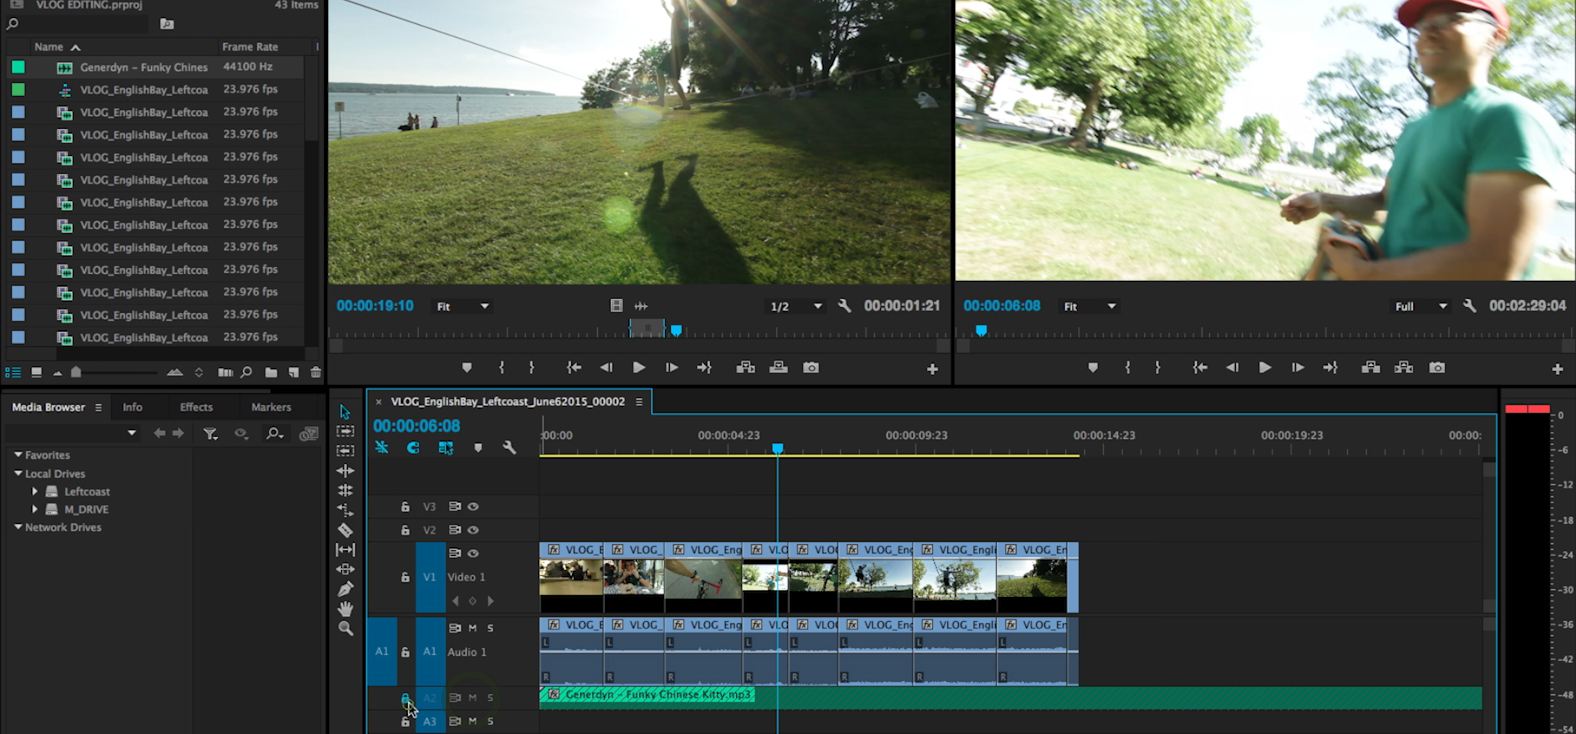
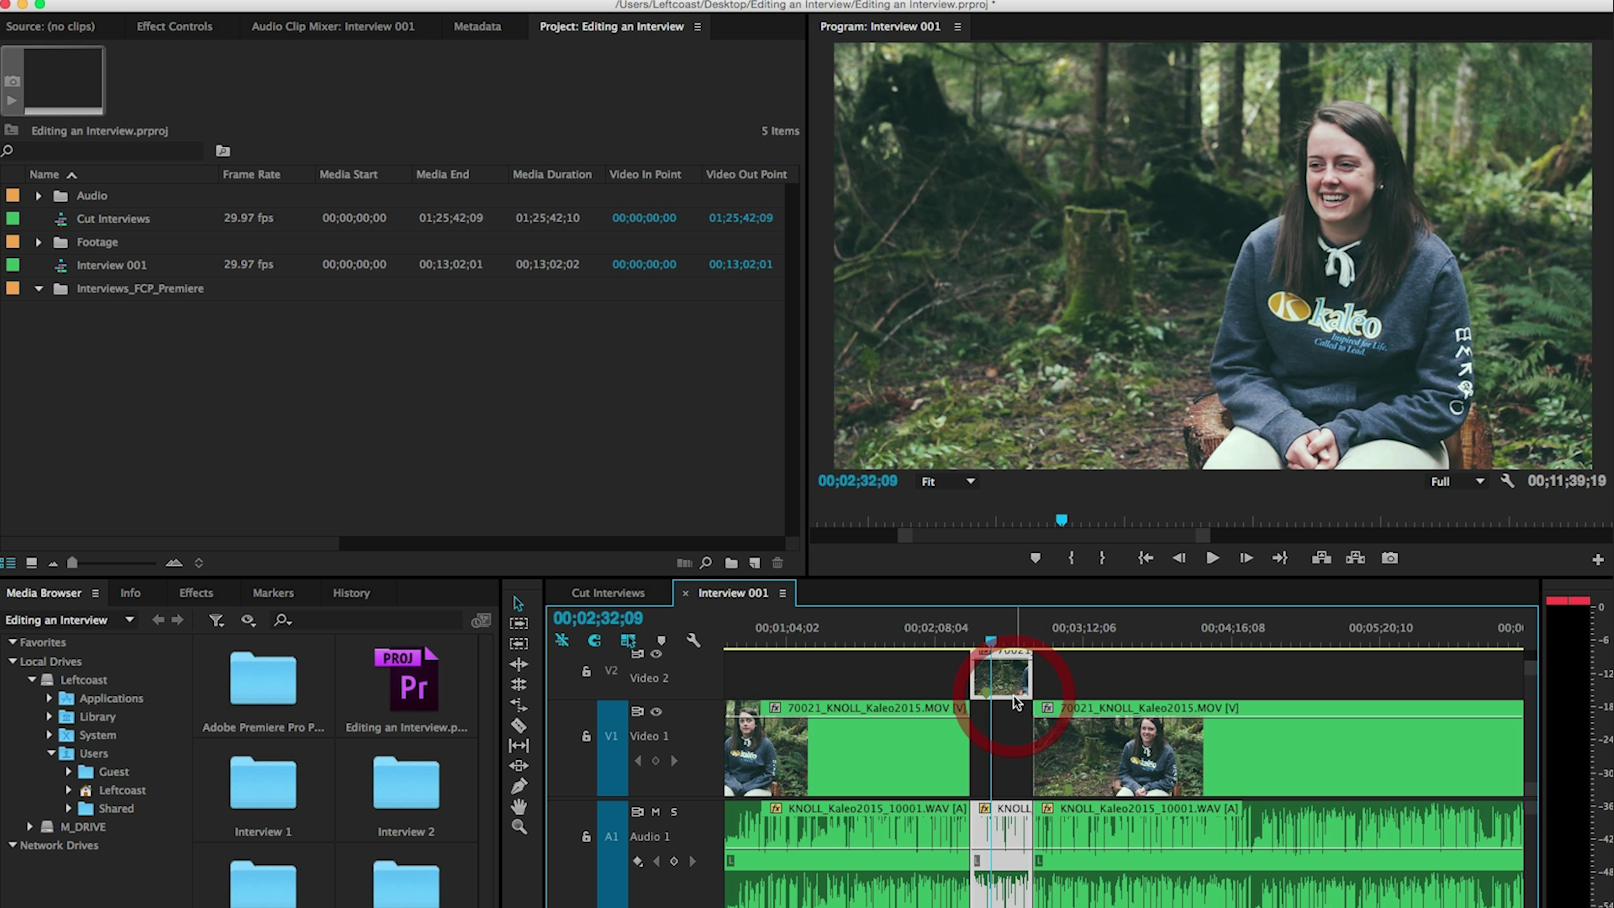
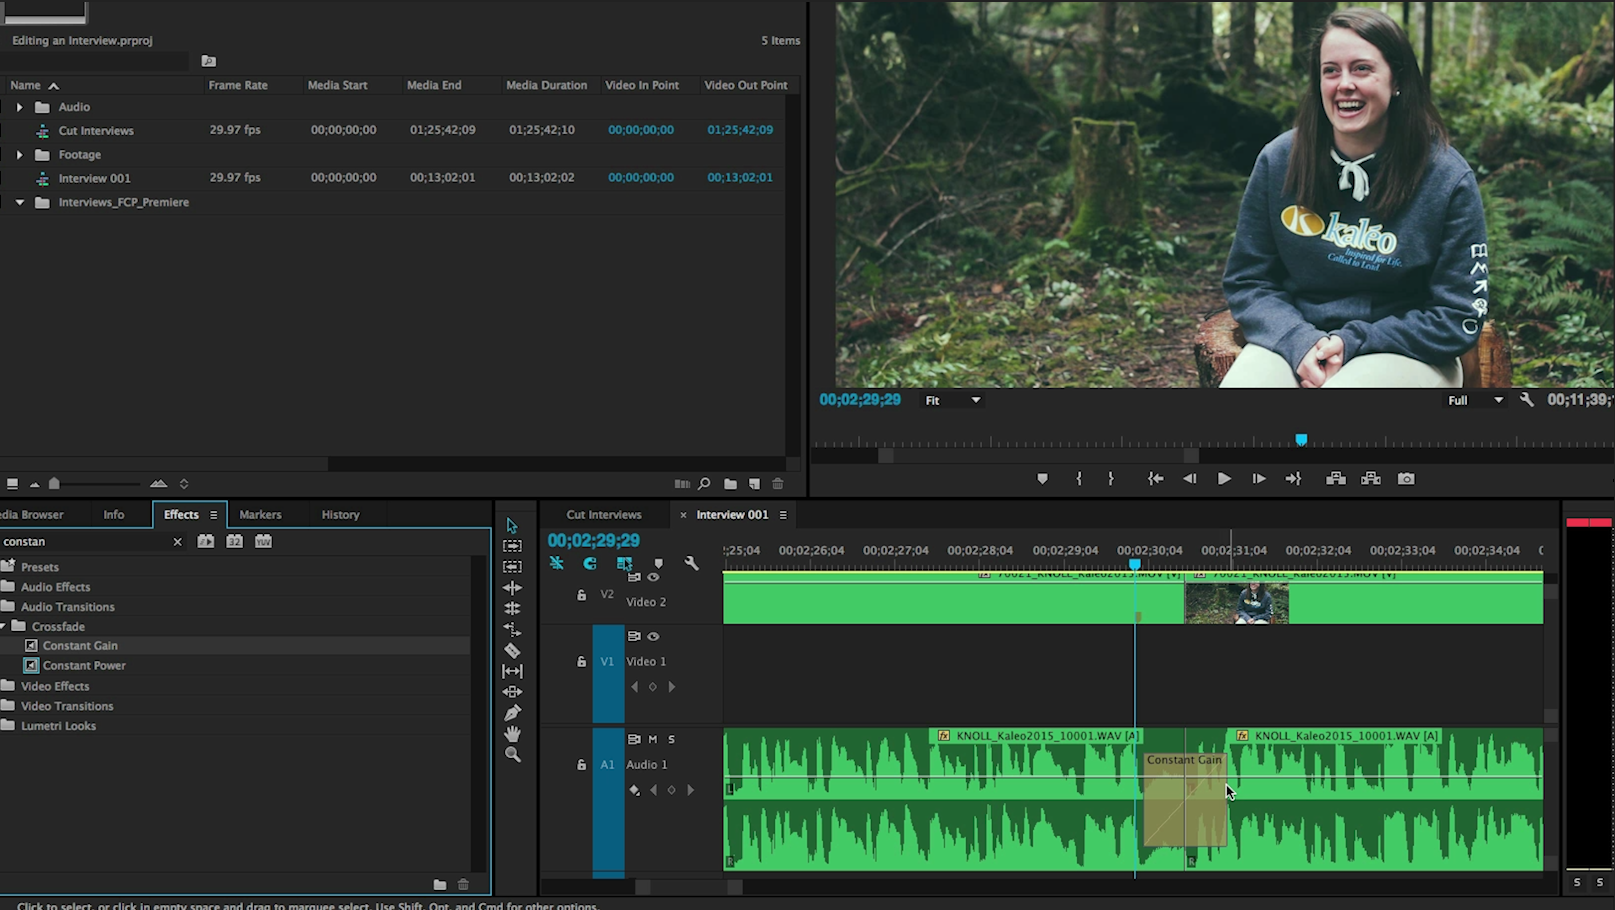
Something that is really helpful with licensing sites is they allow you to download audio marked temp tracks. I downloaded, edited to and seriously considered over 35 tracks! Often I would think I found a great track to use, but then over time I would get sick of it on the 20th or 30th pass. At that point I would ditch the track and find something new. I was always downloading and trying new songs in the timeline for my film. I would do this and try to get a feel for how different songs effected the overall tone of a scene. This helped me get an idea and start to shape the musical arc of the film. I only wanted to use music I felt continued to grow on me as I went through the editing stages.

Getting Additional Scoring Help

While working on Untethered I had started to get to know a friend of my Chris Pulsifer. He does music composing for all sorts of projects. At the stage we started talking I already had music picked out for most of my different scenes, but I still had some issues I wanted to iron out. He helped me modify the ending of one of the songs in a way that I felt really added to the film. My typical song modifying is lengthening a bridge, or shortening the repetitions of a chorus, what Chris was able to do was create an added ending to one of the songs so  it did not end as abruptly

I spent the most money on this film paying for the eleven different licenses I needed to use the songs in the film. At the end of the day I don’t regret it at all. I am really happy with the music in the film, and I am really happy that I did music licensing the proper way.

THE BEST CAMERA FOR ADVENTURE DOCUMENTARIES

TheBestCameraForBudgetDocumentaries.jpg

THE DAY WHERE THE CAMERA DOESN’T MATTER

We are living in the most accessible age of film creation in all of time. You might say, “sure Levi, of course we are, technology is progressing as it always is.” But take a moment and reflect with me over what has changed in just the past decade of indie filmmaking. We went from having video cameras equipped with tiny censors that produced a very ‘digital home video look’—to large sensor cameras that enable a more ‘filmic’ aesthetic. All in the the span of six years or so.

I want to start off this post about cameras by saying, the cameras you shoot with don’t make you a better filmmaker.

That is the biggest take away. That is the only message I really care about in this gear heavy post. Those of us who tend to get into filmmaking have a huge interest in the technical side of the filmmaking process. That is most likely why you are even reading a post like this to begin with. Don’t get me wrong, I love cameras, I could talk cameras, codecs and bitrates for days. But when it comes down to it I have to acknowledge at the top of this post that the camera is not going to help you tell a better story. In my recent documentary project UNTETHEREDI got to shoot with a lot of different cameras to help make this project happen. I learned a lot about what you need and don't need to actually capture your stories in a visually pleasing way. I love good cinematography and I believe you can achieve this with a semi-minimal setup.

Sony A7s Rig up
Sony A7s Rig up

The Best Mirrorless 4kAdventure Documentary Camera

If you were going to make any sort of adventure film tomorrow and need a camera, I would tell you to buy the Panasonic Gh4.Hands down this is the best value per buck in the game. Coming in at well under two thousand dollars new, this camera is a 4k workhorse. The Gh4 was one of the cameras I borrowed on this production and I put it to some serious use. It surprised me to be honest. The clarity, resolution and flexible dynamic range really made this a super functional camera for me. If I could have had  my perfect situation, every camera used in the film would have been a Gh4. It is such a light and flexible kit. 

Screenshot 2016-02-11 15.13.36
Screenshot 2016-02-11 15.14.35

Even if you have enough money to purchase a larger 'proper video camera,' like a c100 or fs5, I would still strongly recommend buying the GH4 and using your left over funds for other pieces of support gear, or lenses. If you have well over 10 Grand to spend on gear, that changes this advice slightly, but if you are like me and making your own self funded projects, I can't speak more highly of this powerful little camera.

That's my advice right off the top, and that's what I took away from a project that was shot with many different cameras. I am now going to dive into explaining all of the cameras used on my film, and the different things I learned throughout. If you have any questions drop down to the comments and let me know!

I Borrowed Every Single Camera.

When I started this project I decided I really only wanted to use my Canon 60d for timelapse photography. I knew it wasn't capable in video mode to do justice to some of the beautiful landscapes we would be shooting in. I didn't have enough money to buy a new camera at the time, so I looked for any ways possible to borrow cameras in my different stages of shooting. I shot for people for free in exchange to using their camera later.  For this reason the project had over 12 cameras involved in the production, YIKES! That’s kind of what happens when you don’t have one specific camera of your own to shoot the entire film with. It definitely was not ideal having this many cameras, but with the help of my post wizard friend Ryan, we were able to get a consistent look and feel across the entire film. Lets look at the stats and then dive into the specifics of the cameras for this film.

The Exact Final Usage of Each Camera in UNTETHERED

CAMERA'S USED

Links to Prices

The camera I had in my hands the most while shooting this film was the Panasonic GH4. This was the first time I had put one of these guys to use and I was really impressed. In combination with a Metabones Speedbooster I was able to use all of the Canon Lenses I already owned and I was getting results I was really excited about. This camera ended up making up 33% of what you see in the film, but the total amount of footage shot on location with it out of all the cameras was at least over 50%. What I loved most was the size and flexibility. It was light enough that I could climb with it comfortably almost anywhere.


Filming With the GH4
Screenshot 2016-02-11 17.57.25

This camera was also my biggest source of foley audio for the film. I had a Rode Video Mic mounted on it the entire time and I am super happy with the sounds I was getting out of it. If you hear a slackline sound in the film, it was most likely audio captured by the GH4. I also used it for some on location interviews. I never once touched the audio meters and just left it in the auto mode. This is risky, but I wasn’t in a head space to keep making sure my levels were correct. I didn’t want to turn them up and then forget to have them back down and miss a really excited cheering moment. It performed really well in this auto mode.

Pictured above is the Rode Video Mic

The windscreen I bought for it performed super well. I am really happy with the purchase. It was called the Movo WS160 and its available here on amazon for around twenty bucks. I purchased this mic mainly because it had the Lyre shock mount. This mount is far superior to the annoying elastic mount that the Rode mic's are famous for. At the time that I bought this mic the new Video Mic Pro with the Lyre mount had just been announced, and was not yet shipping. I still would have bought the previous generation because of the nearly 100$ savings in price. I also believe that it has better directional abilities because of the added length, but I could be off on that. I have yet to conduct a scientific test as I don't own the Video Mic Pro.

Red Epic with 70-200

The Interview Beast

Screenshot 2016-02-11 15.14.01

I shot all of the set up interviews in this film on the RED Dragon. I was able to use this camera because I was working for a production company who owned one called Transposition Films. I am really thankful to have had the RED to use for these situations. I shot in 6k with at least 8:1 RC so I could easily crop in later in my 4k timeline. That’s why you see the Dragon being the second most used camera in the film. I wish in hindsight I had done a multi cam interview, but for all of the interviews I was running as a one man crew and there was enough to look after as it was. I talk more bellow why I regretted hiking the RED into the forest for the shooting in the mountains.

LeviAllen_Flying_The Phantom 2

My Aerial Filming Setup

The third most used camera on the film is the GoPro Hero4 Black and that is because I shot a crap tonne of aerial footage with the Phantom 2 from Dji. I really wanted this film to immersive components. I wanted it to feel as though you were spending a weekend in the mountains with these guys, and when they are at the height of their experience, there is a visual component to match. It's the reason I tried to do on location interviews to an extent, and it's also the reason why there is so much aerial coverage in the film. I wanted to achieve this flying feel to match what it must be like to have control walking a highline. I also wanted to give an over the shoulder glance down at what these athletes are actually seeing.

The Phantom performed great for my needs. I needed to have something I could easily back pack into location, and get decent length flight times with. I ended up crashing a Phantom at one point in the shoot, but that's a story that deserves more than I have time to fit in this blog post.

Inspire_movi_RedEpic

The other aerial setup used in the film is the far superior Inspire One with the x3 camera. This quadcopter is more capable in literaly every way. This drone is owned by Zachary Moxley. He shot the gorgeous world record footage as well as several shots in the opening sequence.

Screenshot 2016-02-11 15.15.19

My Most Used Lenses

I most often had the Tokina 11-16mm on the GH4. Especially while shooting from the edge of the cliff. I used the canon 70-200mm with 1.4x for close ups, and my Tamron 17-50mm VC for other all other coverage. For interviews I used my trusty Rokinon 35mm f/1.4. My shooting partner RJ Bruni most often had the 24-70mm from Tamron on his A7s, which is essentially the full frame older brother of my 17-50mm.

ND Filters are A Must

In order to have a proper shutter speed and maintain a filmic look while filming outdoors, it's essential to get some sunglasses for your lenses. This is so so important to avoid that stuttery effect you see in so much footage. You might not think you can see the difference, but shoot two example shoots, one at 1/2000 and one at a proper 1/47th and you will see the difference.

UPDATE: I forgot to mention the ND Filter I used. I used the Tiffen 77mm Variable Nd 

My favorite manual prime.

Shooting For the Look in Camera Without a Flat Picture Profile

I launched into production of this film without much time or space to do any testing of picture profiles. Testing before hand is always ideal. This way you can see how different profiles respond to light, color, and how they behave when attempting to grade. I was only able to get my hands on the GH4 the day before heading out on the first 5 days of shooting. For this reason I avoided using any super flat picture profiles or things of that nature. I shot entirely in Cine-D. It is a common practice to shoot your footage with a flat picture profile to help save as much available data from the image as possible. This is a great practice, and I use it often with cameras that I have experience with, and when using them in a slower paced controlled shooting environment. I did not use flat profiles however. I already find it quite risky trying to expose and focus properly when using flat profiles. Especially when you are out in the sun and have a glare on the monitor. So I made the decision right from the top to try my best to get a balanced image in camera. I still didn’t do an amazing job with exposure, but I wasn’t about to leave it up to a flat profile I didn’t have any experience with.

In Post Production We Definitely Had Our Work Cut Out For Us

Because of the whole 12 camera thing, the process of grading this film was an additional challenge. Thankfully I had partnered with Ryan Shcroeder who lended his services to the project. Frankly he did an amazing job. I am really happy with how the film came out as a whole and think it has a very consistent and polished looked. Many have commented on the stunning visuals in the film, and I know this was pulled off in part by Ryan's nifty grading skills. On a fun note, I spent one full day sitting beside Ryan while he was grading, telling him which camera was which in the film. At least I'm useful for something.

My Timelapse Rig

My Kessler Crane 2nd Shooter killin it with the timelapses.

The timelapse portion of the film is enough for a post entirely of its own. So that's exactly what I'm going to do, that is one of the upcoming posts in this series. For quick reference the rig I used was a Kessler Crane 2nd Shooter for motion control. The cameras I used were both a canon 60d, and a canon 6d.

The One Thing I would Have Changed While Shooting

If I could have changed one thing about production of Untethered it would have been shooting the entire film on just one or two cameras. I had access to a RED Epic MX to bring for the first section of shooting. Needless to say I was so stoked. My first project shot on RED, this is going to be so rad. However with brining the RED along into the mountains I bit off more than I could chew. There was frankly to much gear to properly manage and utilize fully. If I had enough batteries and RED Mags, I might have shot the entire doc on RED, but this wasnt the case. I had limited cards (2x 64gb) and it simply was not enough. I had even brought up my laptop to offload, but I ran into issues of my laptop battery draining.

As much as I love RED cameras, If I could have done things over I would have left the RED kit at home for this mountain shoot. We were running as a two man team and had a lot of filming to cover, the RED simply was too much camera for the job. In hind site I would have rather had two GH4 kits up there and had one timelapsing the whole time, or have one getting locked off side angles. I would have loved to shoot the whole project on RED if I had enough power and media but I didn't. Lesson learned. More isn't better.

The End Audience Cares About Story

I've learned more than ever that the end audience does not care about what camera the film was shot with.  I think its obvious that pursuing the best form of our craft is important, but the craft should not intrude or trump the actual craft we claim to care about, storytelling. I had to make some tough choices in this film about including 1080p footage in a 4k project. I included the footage because I believe the content it ads is more important to the story than the 4k resolution.  You know what, not a single person has mentioned that the 1080p footage stood out or distracted them. Not even other filmmakers. You will be able to find many a people on the internet that will tell you that I am wrong about this. But I've decided life's to short, and there's to many stories to tell to worry about those people.

I've decided the only metric I care truly about is stories told that resonate with people. Period. That's it. I am committed to tell stories with excellence using the tools that are available, but a camera will never be a reason for me to say no to a story.
All the gear on the ground

Making a Film With Your Friends and Zero Budget : Podcast Interview

UNTETHERED FILM: LIVE NOW

Untethered takes an immensely personal look straight into the heart of the slacklining and highlining community in Vancouver BC.


This film is an epic ride from beginning to the end. Offering an inspiring look into a group that pursues the unthinkable.

JOIN THE DISCUSSION ON VIMEO.COM

“Your palms will sweat and your heart will race, but you can’t help but be ridiculously inspired. The cinematography, story, and pure slacklife style is beautiful.” - Andy Lewis

FOLLOW ME ON INSTAGRAM

BEHIND THE SCENES! ARTICLES AND TUTORIALS FROM THE FILM

FREE TUTORIALS COMING

I am producing a series of tutorials videos based around this film that I will be giving away for free over the next coming months. If you have any questions you would love answered please sign up bellow and email me your questions directly. Here are some of the tutorials I am working on.

  • How to Edit a Documentary (mini series)
  • How to Fund Your Own Film
  • How to Find a Story to Tell
  • Colour Grading
  • Tips for Run and Gun Shooting
  • The Gear of Untethered
  • The Cameras of Untethered (we shot with 12 different cameras haha)
  • How to Shoot Timelapses
  • How to Shoot Motion Controlled Timelapses
  • How to Edit Timelapses

SIGN UP TO RECEIVE FREE TUTORIALS FROM UNTETHERED!

The films director Levi Allen couldn't be more stoked about the project

This is my debut film that I made with zero funding while living out of a sprinter van. It would mean the world to me if you could take a moment to share it with your friends! Here's an example:

"Just finished watching Untethered, you definitely need to check it out http://UntetheredFilm.ca"

My Goal is To Be As Open With UNTETHERED As Possible.

There has never been a better time to start making videos. We live in a time where there is an overwhelming availability of capable video making tools. Cameras and computers that people decades ago only dreamed of. As a young filmmaker I myself am a product of other people being open and sharing their process and their experience. I want to give back to you by doing the same myself. This notion of trade secrets doesn't exist in my world. The best way to keep up with the content I am making around the film is through instagram, you can follow my weekly vlog or you can join my email list bellow. Let me know what you thought of the film! It would be so rad to hear from you.

A FREE TUTORIAL SERIES AND BEHIND THE SCENES FILM!

One of my favourite parts of movies is getting to watch the behind the scenes bonus features. I a captivated by all that happens in the background to bring these massive films to life. Now that Untethered is released, things are really just getting started! Every Thursday I send out a newsletter packed with value. I am currently working on an entire series of tutorials and behind the scenes videos just for you! Now is the best time to join and I will give you a free software tools guide as a gift. What are you waiting for? Join and send me an email, I would love to hear from you.

Why I am Giving My Debut Film Away For Free: [VIDEO]

This summer I embarked on one of the craziest adventures I have ever undertaken.

In the past months I have worked harder than ever before while investing thousands of my own money into a passion project. I had decided that I was not going to wait for permission to make the types of films I wanted to, I was just going to go for it.

I vlog twice a week and would love to have you along for the journey, you can subscribe here.

I am currently brainstorming some additional things I could put together for people to purchase if they want to, but I haven't reached any conclusions yet. I'll let you know what I come up with.

Written by: Levi Allen VanderKwaak

Case Study: Making of an iPhone 6 Music Video

IMG_0490_featured1.jpg


"I had lots of people going out of their way to tell me how beautiful it was, let alone how well it encapsulated the whole record.” - Teen Daze

In this article I am going to share the details behind a project I worked on recently with Jamison from Teen Daze. I am going to open up the details of our creative process, how we pulled off a beautiful video on a small budget, and more importantly how it's not the specific tools you use, it's how you use them. 

A Still from the video. Shot on my iPhone

Jamison was in the process of releasing his latest album Morning World when he contacted me about what it would take to make an album trailer. We had talked previously about collaborating on something, and it felt great to find something that we might be able to pull off.

We opened up the discussion initially talking about the goals and the feel of what he was hoping the album trailer could encompass. In this scenario Jamison had a fixed budget to work with from the label and that was what we had to work with. It wasn't a big enough project to go out and shoot a tone of new content for, so I started to think creatively of how I could use some material I had already been shooting.

Image0000005.jpg

The Project Came At The Perfect Time

For the entire month before Jamison reached out, I had been shooting a timelapse everyday with my iPhone. As I went through life I would just set it up and capture these quick and beautiful shots. When we were brainstorming a concept for the piece it dawned on me that I could utilize all of the timelapses I had already been working hard to shoot.

Shooting it on an iPhone wasn't supposed to be a gimmick

We genuinely believe in this case that the footage I had shot with my phone was the best to use with the constraints we were working with.

IMG_0486
IMG_0486
The entire video was shot with the above setup.

In my initial brainstorming with Jamison we uncovered that he wanted the piece to have an element of landscape transformations. This made timelapse a fantastic medium to use in order to reach these goals. Commissioning the shooting of an entire timelapse piece requires a significant investment due to the amount of time involved with such a piece. In this situation I considered all the shooting time that went into the timelapses as pro-bono, and the budget of the project was used to cover post production.

Building a Smooth flowing timelapse piece takes intentionality.

My goal was to have this piece feel like a natural journey. An experience that the viewer can go on paired with the beautiful music. This natural flow doesn't happen on accident. In this instance the ordering and timing of everything actually went through many revisions until it flowed just right.

I refined the piece over 16 different iterations until it was perfect
http://www.leftcoast.co/wp-content/uploads/2015/10/Image0000077.jpg

The Technical Details

The key to getting the best out of the iPhones camera is actually to avoid the native time-lapse function altogether. It is crucial to use an app that takes a sequence of pictures at the highest quality the camera is capable. The app I used was called Lapse-It Pro. I would shoot sequences of about 300 images in the app and then transfer them over to my computer to be processed. It is important for whatever app you use, to make sure that for each sequence you lock the exposure for that shot. This way you don't get any flickering changes in the shot throughout.

Once the folders of images were on my computer, I would import them into premiere selected as an image sequence. I edited this piece for 1080p output so a lot of the shots were able to be downscaled allowing for small pans and zooms in post.

IMG_0486
http://www.leftcoast.co/wp-content/uploads/2015/10/IMG_04861.jpg

Real world results

At the end of the day, non of this technical stuff maters if we did not reach the original goals of the project. I waited several months after the release of this video before writing this article. I wanted to have real world results and touch back with Jamison after the release to see if the video was a success. Here are some of the questions that I asked him.

Would you say that the album trailer was a success?

"Definitely. I had lots of people going out of their way to tell me how beautiful it was, let alone how well it encapsulated the whole record/project."

What was it like collaborating with Levi on this project?

"Levi has been a friend of mine for a long time, and though that can sometimes get in the way of a good working relationship, this project ran incredibly smoothly. In only a few short conversations, we were able to get on the same page about exactly what we both wanted the trailer to look like."

At what point do you let go of control trust the artist you are collaborating with bring the project to life?

"I'm definitely aware of my limitations when it comes to visual arts, and so I'm quick to hand the control over to a more experienced professional. I try to make sure I can vocalize exactly what it is I'm looking for, while still understanding that the collaborator have their own vision as well. Striking a balance between those two is pretty important."

You can order Jamisons new album here
http://www.leftcoast.co/wp-content/uploads/2015/10/IMG_0494.jpg

The Most Important Take Aways

It is vital to the health and quality of the final video for there to be a creative process that is outlined from the start. There are lots of different steps and stages along the way, it's important to keep the project moving along and the working relationship healthy, especially between friends. As the professional the final results are my responsibility. This doesn't mean that I just do my own thing and be stubborn, it means that I create a space of listening to the clients goals in the beginning. Once I have listened thoroughly and have gained an understanding, that's when a plan of attack is implemented. 

Tools Don't Matter

At the end of the day I am not paid based off the tools I use. I am paid because I am able to professionally execute on a creative process.

There are people out there who believe that videos should be cheap and easy because the tools are so accessible.

Yes, I am so passionate that the tools are available more than ever before. But an accessible tool does not make up for a poor creative process. One thing I am really passionate about as a creative professional is having a proven process to creating story telling content of the highest possible impact. I don't settle for lower quality, I don't settle for mediocre, I only take on projects that I know have the potential to be my next best work.

How to Move Forward

If you are just starting out, be encouraged. You most likely have a tool in your pocket that you can make something beautiful out of. The main way to get better and create more professional work, is to do just that, create. Create create create. Practice. Trial and error. These are the most essential steps, not which camera you have in you back pack.

http://www.leftcoast.co/wp-content/uploads/2015/03/IMG_6775.jpg

I wrote another article here on my timelapse film Beautiful British Columbia. I shot this film using only a 500$ dslr. I strongly suggest checking out out that post as well.

Profile_Leftcoast.png
Levi Allen

Debut Film Announced! Untethered - A Highlining Film

UntetheredBanner_facebook.jpg

The Cutting Edge of a Height Defying Sport

Spencer Seabrooke is a master of the arial balancing art form known as Highlining. He is one of the few highliners in the world that is truly pushing the sports boundaries into uncrossed territory.

Spencer Seabrooke walking a highline at Brandywine Falls

An Uncommon Union

Untethered follows Seabrooke as he passionatly grows a community of Highliners in British Columbia. The film offers a rare glimpse into the lives of people who do what most couldnt even imagine.

Michael, one of the main characters in the film, sharing some stoke before heading out on a highline.
pictureof highlining

Every weekend people from all walks of life head together into the mountains, with one unifying goal.  They come together to test both their mental and physical limits by walking slacklines stretched between massive gullies.

Untethered is a film covering ground that has previously been left untouched.

This progressive documentary gives a rare glimpse into the mind and life of someone practicing a craft with the highest stakes imaginable.

FriediKhune_walking a line
“They are tethered in right?”

That’s the common question Highliners receive from bystanders who happen upon their mountain top playgrounds. The answer is Yes… Most of the time.

Spencer Seabrooke Walking Free-Solo
C0108T01
C0108T01

There is one highliner in particular who has a knack for walking these slacklines without a tether. His back up being his arms and legs.  That man is Spencer. He has progressed his abilities to a level few can even begin to wrap their minds around. Spencer has pushed himself to have complete mind and body control in order to conquer the discipline of free-solo highlinging.

The Community
The Community

The Journey of Personal Progression and Community Growth

This film follows Spencer and his closest friends on the journey of a life time.  This summer Spencer became the first man in almost four years to extend the length of the World Record Free-Solo highline walk.

The films director Levi Allen couldnt be more stoked about the project

Yet It’s about so much more than breaking a record. It’s about pushing the boundaries of human experience.  It’s about testing the limits your limits. It’s about forming a community centred around a passion for exploration. Untethered Gives You a Ride of a LifetimeThis film is an unparalleled journey into the world of highlining. A story that will leave you captivated till the very end and have you still hungry for more. Untethered is sure to inspire the progression of personal limits and motivating viewers to reach higher for what life has to offer.

Gain Exclusive Access to the Launch of UNTETHERED

This film will be launched in December on Vimeo entirely for free. I have toiled over the crafting of this project and I cannot wait to share the experience with you.  You can join the Leftcoast Collective to receive weekly behind the scenes value on the creation of this project. I send out an email every Thursday to those in the collective.  What are you waiting for?


Images primarily shot by RJ Bruni from www.RjBruni.com

Title Image provided by Zachary Moxley

An Epic West Coast Sailing Adventure

IMG_01271.jpg

Pursuing the Grizzlies

We had set off sailing up the beautiful Knight Inlet on the northern end of our trip. We were making our way up the inner coast of Vancouver Island and had already seen some amazing sites. However I got really excited when I heard we might make our way up to this beautiful place. To me Knight Inlet has remained a place of magical memories. A place that seems straight out of an adventure book.

It was in this exact spot two years ago that I had seen my first and only Grizzly bear. That memory has stood above most as something I won't be forgetting anytime soon. Being in the presence of a powerful creature in it's natural place of life, is a crazy experience.

We paddled in on dories from the Swift in Knight Inlet

On this trip however our first scouting mission was completely silent. Nothing. We heard word that ten sub adult grizzly bears had been seen that day alone, and yet in our two hours of paddling around we saw nothing.

Paddling back to the Swift

Feeling deflated we packed it in for the night. Not to long after dinner we received radio that there were more bears out. So setting off again we paddled off to catch a glimpse of these elusive creatures. On that trip alone we manage to see five bears! How crazy is that.

A Grizzly bear
A Grizzly bear

I was overjoyed with excitement. After a night of songs on the boat we settled in for the night. The next morning there was a buzz aboard the ship as we got news there was a mom and her cub near by

Such a Powerful and Beautiful Creature

We silently moved the zodiac in as gently as we could. Everyone was almost holding there breath as we made it towards the shore. Our view was obstructed from these large posts in the water by the shore. These pillars that used to hold up a dock of some sort. Someone said they saw something move and we all strained our sleepy eyes a little more. Sure enough as we got in just a little closer there in plain site was a mother and her cub prowling the shore line. I thought to myself, this is why I love sailing, this is why I love adventure, it's all about moments like this.

The Pacific Swift Sail Boat

This is a Film I Made With No Budget, Entirely For Free

What excuses do you make when you put of creating projects you are passionate about? I know that I have tended to make a lot of excuses over the years. I don't have enough time, I don't have a nice enough camera, or maybe the content wont be good enough. Avoiding making things your passionate about seems all too convenient these days. It seems that a lot of people in the video industry have become so accustomed to saying,

"I can't afford to work on videos I want to. You know, gotta make money from those corporate clients, it's boring but it pays the bills."

I don't think you can afford to not focus on your passions. I have caught myself thinking in a similar fashion and I am convinced it doesn't have to be this way. We can still be making films about the things that we love, even if we claim to not have time to.

IMG_0449
IMG_0449

If you are not making time for projects your are passionate about now, I don't think you will ever make time them. It all starts with today.

On this trip it wasn't even my responsibility to make a video. I was volunteering as a Watch Leader and helping run the sail training program aboard the vessel. Video was definitely a back seat priority. Yet even though it was back seat to my actual responsibilities I still took it seriously enough to make something I am proud of from the trip.

Being Okay With Less than Perfect

This was all made possible from being okay with less than perfect. Is this the quality of videos I want to be making? Not necessarily, for me I know I am capable of creating films of a much higher caliber, but I don't think that means I should pass up on the opportunity to make something when the story is there. Not everything can be a 100% film. One thing I am noticing is that people pay attention to consistency far more than they pay attention to announcements.

IMG_0295
IMG_0295

It is my Goal to be a 'Go To' Outdoor Adventure Storyteller in British Columbia

I don;t want to be the go to adventure film guy because I want to be better than others. I definitely don't want to in order to win some type of social media race of stats and numbers. This is my goal because I want to be making films like this all the time. It's that simple.

I come alive when I make films about adventure.

I want to say no to making anything less than what I am passionate about. It is so hard to do this, but it means when I am selective in picking my projects, it creates the potential for each project to be the best thing I have created. That is the type of work I want to be making. Capturing and sharing stories that make me come alive.

Swift and Dusk
Swift and Dusk

Right Now I am Covering My Bills So I Can Make Films that I Want to Make

Currently I am doing a lot of freelance editing. I am doing this so I can pay my bills and not be forced to take on clients or projects that are not a good fit for my company. I am growing Leftcoast Media House to be a specialized production house that tells adventure stories with excellence in the Vancouver and greater British Columbia area. I believe that you can make the tough choices to enable yourself in doing this as well. You can be making what you love if you are willing to sacrifice and fight for it.

Profile_Leftcoast.png
Levi Allen

I Started Vlogging Every Week - Leftcoast Life

Screen-Shot-2015-08-27-at-7.07.12-PM.png


I am super excited to share with you that the Leftcoast Life Vlog has started and is definitely sticking around. My original vlogging ideas started for me back in highschool, but I never had the courage to commit with doing it regularly. I have finally decided that waiting isn't going to help, and so this summer I mustered some courage and decided I was just going to go for it. Initially in my head I thought, yeah, I'll do it for just the summer and see how it goes. I have since decided that I love it, and it's not going anywhere any time soon.

Leftcoast Life is here, and it's here to stay.

Why Start a Weekly Vlog?

For me it had the most to do with wanting to grow my muscle of commitment. Earlier this year I started blogging and writing a newsletter every week, and I knew I was capable of creating more things on a regular basis. I read once in a book that people who are creative when they feel creative just do art for a hobby, those who create even when they don't feel like it are the professionals.

This resonated with me. I especially felt like someone who mostly created when I felt inspired or that it was convenient. I knew I could create more, but without the commitment, it simply just didnt happen.

Something Amazing Happened

For me the idea of vlogging, and even creating videos in general, has never been about the quantity of views. I  have always felt that the views only matter when they are connected with people that actually care. To be honest I have found it challenging to build an audience of people who want to see my most meaningful work. It has always been my fear that one day when I make something I am really proud of I will have no one to share it with. Yes I can share it with the internet, but I want to be able to share it with those who care about the process that went into it and are genuinely excited to see the final results.

Vlogging has been an amazing way to authenticaly connect personaly with those that might care about my work. The effects have been almost immediate. Sure someone can feel inspired when they see a beautiful video, but it is way easier to inspire people when you are building a relationship with them. For me, vlogging has become in even these short months, a genuine way to build a relationships with people. It gives me an opportunity to provide them with more value and inspire them to do more themselves.

Vlogging is now my primary way to authenticaly connect with people online, in vulnerable and honest way.

This is all just the beginning, but I am super excited for the response I have received from people so far. I really do enjoy creating them, and I love the challenge of making them regularly. Don't tell anyone, but I am thinking of making them twice a week soon. I hope you have enjoyed the Vlogs as well. Bellow you can find three more of my favourite vlogs so far, which ones are your favourite?

Let me know what you think of the vlogging on Twitter or Facebook.


100 is an Amazing Number // A Discussion on Taking Steps Forward


Creating videos that have impact, growing your audience, and making work you are proud of is a challenging endeavor. Starting can be a challenge and following through can be even harder. It's easy to feel that you are the last to the game, that everyone else is too far ahead. You may be thinking that if only you had the chance to get an earlier start then you would be able to make your projects happen and get your work out there.

I want to challenge you that this is not the case. I heard a saying once that resonated with me: The best time to plant a tree was 25 years ago, the next best time is today. I want to challenge you that the best time to start creating your next project, the best time to start putting yourself out there, is now.

Every single person who creates started somewhere. They most likely started at zero. They started at square one. If that's where you feel you are, don't let it discourage you from starting, let it be motivation that you are in the best position to start.

Who do you look up to?

Who's work do you admire and wish one day you could be creating and having the impact that they are having. It can be so challenging to see which step to take next in order to get to where they are. That's because there is no single step one can take to get to where they are. They didn't take a single step, and neither will you.

There are hundreds, if not thousands, of steps between beginning and becoming an established expert.

This is actually really good news. This means that we can make mistakes as we go and course correct along the way. We don't have to take one strategic massive step; the formula for progress is to take daily consistent steps, even when it is hard. My goal is to help ordinary people in their pursuit of extraordinary results. I love helping others grow and succeed. That is why today is such a big day for me.

Today is an Important Milestone

It's a big one for me. I have been working on building my email list since March earlier this year, and today I am stoked to share that the Leftcoast Collective has grown to 100 members.

"But Levi, my grandma has more instagram followers than that."

This is a huge deal because those that are apart of the Collective are real life people. They feel more like individual people than any other social network statistic. I don't care so much about numbers, I care about connecting with real people. You are a real person reading this, and 100 people like you have chosen to let me in their inbox. I do not take that lightly.

I will never have 100 members on the collective ever again. Even later today this number will push over 100 and I will have 101. In a way I feel like a parent who is mourning the inevitable reality that their child will one day grow older. I want to cherish the opportunity I have right now to help those who are already aware of my work. The goal for me is not bigger numbers, it is greater value given to more people.


It was January this year when I was sitting at my desk trying to figure out what I could possibly start writing about. The idea of building a website was a mountain before me that seemed unsurmountable and I couldn't think of where to even begin. You want to know how I started? I just took the first step. One step. For me that was registering a domain. Yet I couldn't stop there. There have been many steps in between then and now, yet I still feel as though I am just getting started. I want to take a moment and share some of my goals for how I want Leftcoast to continue to grow.

Where are Things Going? 

The short story, create a lot more stuff.

1) Show Up More Often - This is the biggest one. Consistency is challenging and I want to make it a higher priority to be creating useful and helpful material every single week.

2) Create More Specific Tutorials - This is something that I feel I can be doing to create videos and posts that are far more helpful. Creating content that specifically teaches a certain skill.

3) Help those Who Want to Learn, and Share With Those Who Just Want to Follow the Story - This is something I have been wrestling with how to go about. There are some of you that are aspiring video creators that want to learn skills on how to create better videos. There are others that just want to follow the progress of some of my films, receive the Vlogs and hear behind the scenes stories of what I have been creating. I want to find a way to deliver the best I can to these two groups of people.

I am really excited for the next leg of this journey. I am seriously so grateful. This journey for me has been challenging, it's hard to create regularly. I want to encourage you in the pursuit of what you love. What is preventing you from starting? What next step do you need to take that you are over thinking? I believe in you, you can do this.

Written by: Levi Allen VanderKwaak

 
Profile_Leftcoast.png
Levi Allen

A Mind Blowing World Record Jump

WorldRecordRzrJump.jpg

https://www.youtube.com/watch?v=F0DCBebgdUc

Hidden away in a small valley on the top of Sumas mountain in the quiet town of Abbotsford British Columbia, is the compound of a man named Al. This man is single handily making a loud statement about the quality of his craftsmanship for our viewing pleasure. Al is progressing the sport of UTV racing and… well…. UTV jumping more than anyone one else in the country.


Stock UTV Rzrs bought off the lot are definitely not equipped for this level of performance.


RazorJump_Stills_May2015_00158
That’s where Al’s company Concept Distributing comes in and outfits these machines to be powerhouses that are actually safe to jump.


Al’s workmanship creates beautiful pieces of art, the chassis he builds for these machines are incredible.


RazorJump_Stills_May2015_00176
What’s even more awesome, is he is willing to prove firsthand how much he trusts his work.

Shattering World Records

Working with Brad Friessen, we had a great opportunity to come out and document some serious record breaking take place.
A001_C035_05186V
On this project I was the Steadicam operator, Secondary Drone pilot, and also handled all the Post Production and Editing. The piece itself was put together and coordinated by Brad Friessen, who was also the amazing Helicopter Pilot. The video was made for Brad’s recently launched Helicopter Youtube Channel that you definitely need to subscribe to.
 

Shooting for the Edit

On a day like this there was a lot of downtime in between the different jumps and lots of prep time involved with pulling off a stunt of this size. Safety was a high concern and so nothing was rushed. It is so easy to over shoot and end up with a loads of footage you won’t need, and as a result potentially miss out on key moments. I find it is far better to instead of just roll your camera on every thing that is happening really look for those key moments that you know will actually end up in the edit. Your editor with thank you a thousand times over, trust me.

A001_C031_0518KV

Getting Into Those Hard to Reach Spots

Screenshot 2015-08-13 20.54.13
I love shooting with the GoPro cameras for stunts like this because it allows you to get into these hard to reach areas that provide an amazing perspective. With this video there is a lot of the same jump happening over and over and getting that visual diversity is key to help keep the viewer engaged.

The Gear

Inspire 1 and phantom 3
Josh Knepper was operating the Red Dragon out of the helicopter.
We had a slew of Hero 4’s mounted everywhere you could imagine.
There was a GH4, a canon 60d and a 7d.
RazorJump_Stills_May2015_00180


For the multi rotors we had two quads from DJI brought and piloted by the team at Sugarshark productions.
IMG_9690-2


I had a chance to shoot on their Phantom 3 while watching Mark and Anastasia shoot tandom with the Inspire. Watching them thread the needle with the inspire really impressed me with the amount of control they could have with this copter at high speeds. DJI is certainly doing something fantastic with their higher level drones.

Join a Filmmakers Collective

Do you want to get insider updates on all of my film projects? Join the Leftcoast Collective. It's a weekly newsletter filled with fantastic value, resources for growing as a filmmaker, and behind the scenes posts on all things Leftcoast Media House.Common, what are you waiting for? We would love to have you. I'll send you a free guide as a welcome gift.
[yks-mailchimp-list id="e34efe9754" submit_text="I'M IN!"]

Ice Skating on Surreal Heli-Access Alpine Lakes

Skatingonmountainglass.jpg

https://www.youtube.com/watch?v=B_ab5NZDbKg I am so excited that I get to share with you some projects that have been in the works across the past two months.

What do you get when you combine a helicopter mounted with GoPros, an awesome pilot, hard to access alpine mountains, impeccable black ice, and two professional skaters? Actually though, what do you get? I am asking because I seriously can't figure out how to describe this video.

Beautiful British Columbia

A SERIES OF HELICOPTER BASED OUTDOOR ADVENTURE VIDEOS

I finally can share about a project that I have been so excited to talk about with you guys. For the past couple months I have been working with an amazing helicopter pilot and all around a genuine Canadian to the core, Brad Friesen. I've come on as the lead editor and one of the cinematographers for his new YouTube channel that just officially launched.

Beautiful British Columbia


WHAT ARE YOUR PRODUCTION QUESTIONS?

We have some amazing episodes in the works that I am really stoked for. I want to write articles that answer your specific questions. What do you want to know about making a video like this. So seriously, what do you want to know? If you are part of the Leftcoast Collective, send me an email directly! You could also head over to my post about it on facebook and ask your questions there.

Screenshot 2015-07-02 15.41.12

You Can Double Your Edit Speed // Editing Adventure Films

https://www.youtube.com/watch?v=i5_q50c9k7k

Once you get a basic grip of your editing software, you will move from baby steps to starting to learn some of the secrets of the trade.

Tips and tricks that will make a massive difference in how you edit your projects are worth the time to learn as soon as possible. For me when I learned this trick I am going to share with you, I was literally laughing at how much faster it allowed me to edit. Something so simple and yet so effective.

The trick I am teaching you comes in handy during the stage of your project when you are cutting your selects from your footage. You are trying to find the best moments from what you shot and start to build a video.

You need to edit fast, ignore getting specific and lay out a rough cut as fast as possible. Don't waste your time getting picky with the length of your shots.
Screenshot 2015-06-25 09.39.32

STEP 1: Set In and Out Points With a Shortcut

When you have your sequence created, use the short cuts 'I' and 'O' in order to set your in and out points efficiently. These are the points that premeire uses to drop that section of the clip into your sequence.

STEP 2: Drop the Clip into Your Sequence

Once you have selected your in and out points use the comma key ',' to drop it down into your sequence at your play head.

SPEEDING UP THE REFINING OF YOUR EDITS

Now that you have your rough cut laid out you can begin to cut more finely the clips you want to use in your edit. A huge way to speed this up is use the keyboard shortcuts of 'Q' and 'W'. When you press Q it will 'ripple delete' the clip beginning to your playhead. When you press W it will 'ripple delete' the end of the clip to your play head. Go on, give it a try.

Using the lock on a video audio track for when you ripple cut

Some things to note: Ripple cutting will chop every layer in the sequence that is not locked. This is important to note if you have a music tracks that you do not want to end up all chopped up. You can work around this by simply locking the track.Refining your edit with ripple cuts is an extremely efficient way to edit to the beat of the music. Play in your timeline and pause exactly at the beat you want to cut to, then use a ripple cut to make it happen.

I love this tip. I hope it has helped you. If you have any questions connect with me on Facebook or join the Leftcoast Collective to contact me directly!

book cover
book cover

Download Free Guide

I have made this guide available to all current and future subscribers of the Leftcoast Collective. If you would like to receive a copy of it directly join the Leftcoast Collective bellow. I will continue to send free great content every Thursday and you can unsubscribe at any time. [yks-mailchimp-list id="e34efe9754" submit_text="SEND ME THE FREE EBOOK!"]

Written by: Levi Allen VanderKwaak

Profile_Leftcoast.png
Levi Allen

How to Add Film Grain to Your Projects in Premiere Pro CC


You can view more of my films on Vimeo

Film grain is a fantastic way to help add an organic look to your digitally shot footage. I use it often, almost every project I work on actually. It's especially helpful when you are using denoising plugins and the absence of grain becomes a little unnatural. I am going to show you how you can add film grain in Premiere Pro CC, but the same principles apply to all editing programs.

Here is an Adventure Film that I added Film Grain Too

A Free Pack of Film Grain

Here is where you can get a free film grain pack: Gorilla Grain. The sign up form to receive the download is on the right hand side.

Step One: Finish Your Edit

Add your film grain after you have completed your edit and color correction. Adding it to your Timeline can slow down playback so I prefer to add it last. One thing to note is when you are color correcting you can be a little on the dark side because *when you add the grain it brings up the brightness of your shots. *

Step Two: Import Your Grain and Add to Sequence

After importing your grain pack of choice you have a few options to pick from. Most packs will come with a Fine, Medium, and Course grain. They also come in varieties of how much dirt or grit the have in them. My favorite is Medium Clean, once you have selected your add it to your sequence in the layer above your footage.

Step Three: Change Blend Mode to Overlay

stepthree
stepthree

Go to the effects controls panel and drop down the opacity settings. Then change the blend mode to overlay. Windows>Effects Controls>Opacity>Blendmode>Overlay You can fine tune how much grain you want by using the percentage. I tend to use somewhere between 60-85% most of the time, but it is really your call.

Step Four: Multiply the clip across the sequence

When your grain is fine tuned, you can copy and paste it across the rest of your sequence. If you make any changes to your settings you can select opacity from the effects controls window, copy it, and then paste it to all of your clips to change them as well.

Bonus Tip: Helping Your Dissolves Work

addacolormatte
addacolormatte

You will notice now that if you try add a dissolve or fade to black on one of your clips it does really work. One way to fix this is by adding a black color matte underneath your shot that has the fade to black. You can make a color matte by going to File>New>ColorMatte

Well there you have it, a really straight forward process. I encourage you to give it a shot and see how you like the results. I love the way it looks on my adventure films and other pieces that I want organic texture in. If you have any questions please do not hesitate to ask. I love that you stopped by to watch this tutorial. It would be great to see your results, connect with me on twitter or Facebook and show me what you've made.

Until next time, Remember life’s better when you make stuff

RECEIVE FREE GUIDE & NEW TUTORIALS

Subscribe to get my free guide, and receive all the latest adventure content straight to your inbox.


Unsubscribe at any time.


Written by: Levi Allen VanderKwaak

Profile_Leftcoast.png
Levi Allen

Taking Event and Travel Videos to the Next Level

MakingAwesomeEventVideos_title.jpg

MakingAwesomeEventVideos_title

I am going to teach you a few tips on how to take your next travel or event video to the next level. (Spoiler Alert: Gear doesn't help as much as you would think)

Okay, so you feel pretty comfortable with your camera. You know how to work it and you think you could tackle documenting  your travels or shooting that next event video you've been hired to make. But you might be asking, as I have been asking, "how do you take your video from being just a simple montage to an intriguing story."I encountered more answers to this question on a recent shoot I got to help with. The event video is in a category of its own (as far as event videos go). Yes, really expensive gear was used on the shoot, but there was more happening than just gear.  Today I am going to share with you a few of the simple steps i've been learning about developing your story and improving your videos dramatically. 

I am going to use this event video as an example of how you can incorporate story elements into your videos. First I want to give you a little bit of context to this project. As I wrote about earlier, I truly do feel that one of the best things you can do when exploring using your passion to make a living, is getting to do the actual work hands on. The actual work itself; the daily grind. Not just the dream you have in your head of what it could be. The fastest way I can find to do that is working temporarily for another company. Taking this step is totally okay on the journey to growing your own company. You will learn more faster and get to see the inside workings of a company first hand.

This stage of working for others is what I currently am at. I sought out working with a fantastic production company here in Vancouver City, Transposition Films. It's a small operation that consistently pumps out stunning content of top quality. I really respect the two partners that own and run the company; Ryan and Josh. Working with Transposition so far has been a blast.

Levi Allen shooting with Josh Knepper
Above is the DP Josh Knepper and Myself!

This video was produced by Transposition Films. The role I played was helping the DP Josh Knepper operate the A Cam.  I only played a small part of the production, but I will speak of the project from a holistic perspective. The credit goes to the all the others that worked hard to make this a reality.

Pretty Fantastic Video Right?

I mean as far as event videos with extremely tight turn arounds go, this one turned out fantastic. I have to say my favorite part and what I believe really brought it to the next level, is the way the team was able to develop a story around this production.

SO MANY TRIP OR EVENT VIDEOS END UP BEING 5 MINUTE MONTAGES OF RANDOMLY STITCHED TOGETHER SHOTS. QUITE BORING ACTUALLY.

So often when setting out to make a video you can feel desperate that you need to get enough coverage of absolutely everything. Then when you go into the edit you feel as though you need to include all the components of what you shot. This is the first misnomer I am going to debunk.

Your Video Can't Possibly Include Everything, So Stop Trying To.

Less is more. Focusing in on a visual motif, a story line, something that can carry the piece along. These are all critical steps to kicking things up a notch. This is one of the most important things I have to say. So hear me now, focus in on a single element of what's happening in your video. Is it an event with people at it? Focus in on one person to try tie the whole thing together and show their experience. Making a travel video? Try share why you are visiting certain locations and why the viewer should care about the landscapes you are showing them. Share in the video how they moved you. With the Run For Water video there was so many things we could have included. Literally thousands of options. Instead of trying to include it all we focused in on one component or storyline. The piece is infinitely better for this reason. There are many storyline options you can chose from.

Screenshot 2015-06-04 19.29.17

I just saw a travel video made by Jeff Sheldon. I really like this video because Jeff implemented good visual storytelling without having crazy expensive equipment. He implemented a strategy to give the beginning of his video more focus. His filming wasn't incredibly complex or with expensive gear, but he used the tools he had and focused in on a component of the story. You can find the video here https://vimeo.com/110170664.

Jeff starts off this video with the shots of feet walking on all sorts of different ground. It really helps establish the feel of a travel video and that there were a lot of places visited. It focuses the viewer in to this idea that they are experiencing a trip from the perspective of Jeff, the owner of those two feet. It is something so simple but starts off the video so well.

Try to Develop a Story Thread Beforehand

Putting in effort on the front end to develop or think about your potential story, helps give you focus when it comes to the day of shooting. Doing this before hand means you're  not trying to piece together a thread afterwards from the footage that you already shot. The concept for the Run for Water film was simple, a mirrored day in the life of a girl doing the run to raise money, and a girl that will benefit from the donated money. Since we developed this story thread ahead of time we were able to get strategic shots of our talent on the day of that helped to tie the whole piece together.

Do not Use Your Gear as a Crutch

Having great tools is fantastic, but they certainly aren't going to make the story for you. I am fully confident we could have shot this event with our iPhones and still told an intriguing story. Sometimes you can get so caught up in trying to use fancy gear on the day of that you actual miss a lot of the important details. On the flip side, far to often I hear people say that they can't create good videos until they have *insert dream piece of gear* to shoot with. This is simply not true.

LIMITATIONS CREATE EXCELLENT OPPORTUNITIES

When you have limitations it actually forces you to focus instead of paralyzing you with options.

Go with the Flow, Capture Life as it Happens.

Seriously, just run with it. Document things as they happen and try not to stress to much. You will make mistakes. You will miss some fantastic moments. But if you work hard you will also capture some of those beautiful moments that no one could have planned for. Sometimes when you are shooting it can feel like every single person in your vicinity is looking at you. When I first started shooting events I found this oddly uncomfortable. For some people it can be even worse and they will feel like they should shoot at all. Here is the truth. People are not thinking about you or judging you as much as you feel.

That is the reality and you have to keep telling yourself that. Yes there is the occasional jerk, but most people won't give a passing thought to you and your filming. Of anything they will just find it interesting and then move on with their day. Don't let what you feel others could be thinking prevent you from shooting boldly. Who cares if it looks like your too 'into it.'  Get the shots you need and try your best not to worry about other people. This is were there is a big benefit to shooting with a simple camera system. The more gear you add and the more fancy you look the more attention it will draw. You can use a really small get and get fantastic results without drawing much attention.

I truly do hope this gives you some ideas for your next event shoot. Remember, try your best to focus in on a story element that can help pull the whole thing together. I would love to see the results of your efforts. Tweet at me @theLeviAllen and I would love to see what you are making.

Remember,

Life's better when you make stuff.

book cover

Download Free Guide

I have made this guide available to all current and future subscribers of the Leftcoast Collective. If you would like to receive a copy of it directly join the Leftcoast Collective bellow. I will continue to send free great content every Thursday and you can unsubscribe at any time. [yks-mailchimp-list id="e34efe9754" submit_text="SEND ME THE FREE EBOOK!"]

Written by: Levi Allen VanderKwaak

Levi Allen

How to Get Fantastic Interview LAV Audio on the Cheap

LAVAUDIO.jpg

LET'S FACE IT, GETTING GOOD AUDIO WHEN YOU ARE STARTING OUT CAN BE AN EXTREMELY DAUNTING TASK. I AM GOING TO SHOW YOU A TIP SHOWN TO ME WHEN I WAS JUST STARTING OUT. GETTING YOUR FIRST LAV MIC DOESN'T NEED TO BREAK THE BANK AND CAN STILL GET FANTASTIC RESULTS IN MANY AREAS OF APPLICATION.

I first learned this out of necessity when I had my first wedding to shoot, but now I use it all the time for all sorts of applications. The trick is fairly straightforward and not terribly innovative, but the results are fantastic.

GreatInterviewSound_Leftcoast_May2015_00006

INSTEAD OF INVESTING IN AN ENTIRE WIRELESS MICROPHONE SYSTEM, INVEST IN A SMALL RECORDER TO PUT IN SOMEONES POCKET AND A WIRED LAV MIC. SKIP WIRELESS ALTOGETHER.

That's the magical combination right there. The best audio you are going to get of someone talking is through a shotgun microphone, but the second best option is a LAV mic directly mounted to the subject. Adding this to your production arsenal brings up the quality immensely. If you are going to have any video with talking in it you need to get that audio as best as you can.  Eliminate the need for a wireless setup and simultaneously cut down your audio equipment costs exponentially. The principle of using a wired lav with an audio recorder can be applied to many different makes of equipment (rode even makes a mic that plugs into your phone), but I am going to recommend the setup I use. I am going to recommend it because I trust it and I know that it works.

1) ZOOM H1 Audio Recorder

2) GIANT SQUID AUDIO OMNIDIRECTIONAL LAV MIC (You can also buy directly from his site. If you buy from his site you can get a better quality right angle connector which is what I opted for. )

All said and done, the gear comes in at less than 149$ which is fantastic.

This film is an example of using this mic setup in a real life situation.

GreatInterviewSound_Leftcoast_May2015_00014

So you've ordered in your setup, now what?

Here are some tips that will help your first LAV experiences go a lot smoother.

  • Set the recording mode to WAV instead of MP3. That way you get more flexibility to EQ in post. (you can turn on lo-cut if you would like.
  • For setting the audio gain level most often it's best to go manual. Get the subject talking to you in a normal talking voice and try set it so the average amount of their talking is hitting at least -12 on your meters. This is tough because sometimes if they laugh or get to loud it will peak, so you need to be careful.
  • I sometimes set the mic to automatic. I've done this in a wedding ceremony when the mic was on the officiate. It auto leveled when he was talking, but then it would boost the levels and pic up the bride when she was talking.
  • I ran two of these LAV setups when shooting weddings (I only shot two). One on the groom and the other on the officiate.
  • For placement I try place the mic close to the collar but in a position that it won't scratch and rub if the person is going to move. Personally I don't mind if the mic is slightly visible in the shoot. Getting the good audio is worth it to me.
  • If you are shooting a talking head video or an interview, I try get the subject to clap their hands when both the camera and audio are rolling so it eases syncing later in post (i'll get to that in a moment.)
  • When you are done put the audio recorder into their pocket and flip the switch to hold once you have hit record. This way non of the buttons get pressed accidentally.
DOUBLE CHECK THAT IT IS RECORDING!!!

It only takes forgetting once to realize how important this is. Even when you are certain you have hit record, double check. So much better to be safe than sorry.

WHAT TO DO IN POST

By using this method you will inevitably end up with a separate audio file and separate video file. Make sure you get your cameras mic loud enough even though you won't use it, because you need this audio to sync the video and audio together. If you had the subject clap, just line up the clap and you are good to go. If not you might need to begin the tedious process of manually lining it up. Investing in Plural Eyes is a great option because it does a great job os syncing your audio for you.

I hope this setup helps you. I love it and continually use it to this day. It is so handy to be able to put a mic on a subject and have it rolling all day. If you have any questions or if things were unclear, join the Leftcoast Collective for free in order to email me directly, or reach out to me on twitter.

Remember, life's better when you make stuff.

Written by: Levi Allen VanderKwaak

Beneath Jamaican Skies // The Story and Film

LRT_00042_3.jpg
Beneath Jamaican Skies Featured Image
All of my being felt incredibly peacefully still. The cool morning breeze was dancing around me and I was readily breathing the fresh air. I watched in amazement as colors began to slowly dance over the mountain side before me. Chills crept over my body as I was overwhelmed with the beauty I was beholding.

I felt as though I was watching a master painter work on his next canvas before me. This nagging feeling came that I shouldn't be here, it told me I was intruding on his beautiful work and he wouldn't want me to watch and enjoy. Yet a stronger and;gentler voice broke through and knowingly beckoned me to experience the present. He seemed to be saying, look here, enjoy what I making.

Beautiful River Stars

I like to call these experiences forever memories. Those precious moments of our human experience that you know won't ever be forgotten. Moments in time where every sensor in your body is taking in everything it can. In times like this it truly does feel like you are writing a good story with your life. You can feel so insignificant in a vast expanse and yet still feel a unique and overwhelming sense of value. It is as if something, someone, is calling you to take part in something bigger than yourself. It's this deep-rooted feeling you have a part to play.

IMG_9993

This is why I love timelapsing. It has brought me to places and given me experiences that I hope to never forget. Once you get the timelapsing bug it begins to change the way you see and experience everyday life. You start looking for patterns and motion in the landscapes around you. It gives you an entirely new perspective to the moving world.

https://instagram.com/p/PAzCTOSLT-/

FILMMAKING HAS DRAWN ME TO SEE THE WORLD FOR ALL IT HAS TO OFFER, IT HAS PUSHED ME TO PURSUE EXPERIENCES I WOULDN'T HAVE NORMALLY PURSUED.

If that's sitting on a mountain through the night watching the stars move by, or chasing the last fading rays of a beautiful sunset. Timelapsing has added a dimension to my life of such rich depth and beauty. The moment I was describing previously was an iconic moment for me and my journey as an aspiring filmmaker. It is one of the few moments in my life where I have felt spoken to so deeply.

Beautiful Jamaican Landscapes

Leaning against a wall in jamaica

BENEATH JAMAICAN SKIES

A FILM BY LEVI ALLEN


You can view more of my films on Vimeo

https://instagram.com/p/Or7qx3SLVs/

BEHIND THE SCENES

This project came about through an opportunity I had to travel to Jamaica with some friends. I had just graduated from High School and I was really keen to make some projects with opportunities to practice and grow. I had previously shot my Beautiful British Columbia Film and I wanted to implement some of the things I had learned from this project. At this point I had gotten the timelapsing bug and literally timelapsed almost anything that would move.

I shot almost every sequence in this film in RAW stills so I could push the settings in post and do exposure ramping. I shot a lot of the sunset and sunrise timelapses using the Holy Grail method. Having these sequences in .CR2 was certainly very helpful. I also shot a ton of glidcam footage on this trip. There are a lot of shots that made it into the film, but literally about 10 times that amount that ended up getting cut.

HOW DID YOU GET SO GOOD AT GLIDECAM?

When people ask me how I got so good at operating a glidcam, I always point back to this trip. It was literally two straight weeks of constant glidcam shooting all day every single day. I would set up a timelapse and then use another canon T2i to shoot moving shots. I put in a lot of hours which helped slowly take my skills to the next level.

How to timelapse with a dslr


THE GEAR

The gear I used to shoot this piece is actually really simple

Modified Flycam Nano ( I extended the middle column so it could hold more weight • Canon t2i (still an excellent very useable camera) • Tamron 17-50mm f2.8 VC (awesome run and gun lens) (one of my favourite lenses) • Rokinon 35mm f1.4 lens (one of my favourite lenses) • Borrowed sigma 10–20mm (I wouldn't recommend purchasing this) • Manfrotto Monopod (MVM500A) (absolute favourite tool for run and gun shooting)

For my intervalometer I used Magic Lantern.

THE SOFTWARE

I edited this film on my mid 2012 Mac Book Pro, it only has 8gb of memory, but the i7 intel chip handles things fairly well and is still my main editing machine.

  • Premiere Pro
  • Adobe After Affects
  • Lightroom
  • LrTimelapse
  • Panolapse

https://instagram.com/p/O7kkX5yLQU/

WHAT WOULD I DO DIFFERENTLY IN THE FUTURE

I learned a lot on this project as you would expect when you spend so much time shooting and editing. I now know that when I create pieces like this I really need to be fighting to find a story that helps tie the whole piece together. This film for me was an amazing accomplishment of a visual display, yet there wasn't a driving story. There isn't a component that grabs someones attention and drives them to watch the entire thing. The only reason the average viewer would watch it all the way through, is if I managed to enthrall and entice them with the visuals. You need more of a grab than just something pretty. With this in mind I would have tried to capture the culture and the people. I would have tried to integrate a human element that viewers could relate to.

Another thing I learned on this project is that next time I am not going to shoot near as many GoPro timelapses. I have hundreds of gigs of .jpg timelapses all GoPro shot. None of them made the cut into the film.

Lush nature in Jamaica

shooting timelapses in a river

Thanks so much for reading about one of my films. It is my goal to create more in-depth posts on my future projects, both in storytelling and in the technical production side. You can send me any questions or feedback through email directly by joining the Leftcoast Collective.

book cover

Download Free Guide of All My Favourite Tools!

I have made this guide available to all current and future subscribers of the Leftcoast Collective. If you would like to receive a copy of it directly join the Leftcoast Collective bellow. I will continue to send free great content every Thursday and you can unsubscribe at any time. [yks-mailchimp-list id="e34efe9754" submit_text="SEND ME THE FREE EBOOK!"]


Written by: Levi Allen VanderKwaak

Levi Allen

How to Edit Video Interviews ✂️

howtoeditinterviews.jpg

https://www.youtube.com/watch?v=Y3jHCcXUfoM

More of my Videos on Youtube

This week is all about editing interviews. This can definitely be one of the more daunting steps in the process of making films. Let's assume at this point you were able to capture an interview with your subject using some of the techniques I talked about last week. Now you are ready to start making your edit.

Often I find this stage challenging. Usually the interview didn't go quite as well as I had hoped it would. Maybe my audio wasn't as good as I wanted, or maybe the subject got off topic a lot. Either way I have found that if I am going to edit an interview, it works the best to do it within days if not hours of shooting it. The longer you put it off, the harder it will be to start.

Editing an interview right after shooting it, is good for a few reasons:

  • You remember most clearly what you talked about and the flow of the conversation.
  • The interviews for your project don't add up and become overwhelming to edit (Trust me, needing to edit 10 interviews to finish your project is a lot more frustrating than just editing one at a time).
  •  Once you are done editing it helps you get a better idea of your story thread and you can more strategically interview in the future or collect the proper BRoll you need.

Editing Interviews is Far Easier Following Strategic Steps

1. Create Your Project and Add Your Entire Interview to a New Sequence.

  • This is the foundation I start from. I create a new sequence for each interview I cut. Once I take my selects from this sequence I always have it to reference back to.

2. Begin Cutting Out the Sections of Just the Subjects Answers.

  •  The main principal here is just trying to remove the sections of me talking.
  • Use the slicing tool to cut right after I ask the question, and then right after. (In Premiere the shortcut for the razor is 'C')
  •  Double press 'L' to fast forward though sections to speed up the process. Speed of editing is key.

3. Raise the Answers You Really Like.

  • Take the sections of the interview you like the most and drag them to the layer above so you can easily see them afterwards.
  • I then copy all of these to a new sequence and close the gaps between the clips.

4. Color Code Your Clips.

  • When I am editing I love using colors to keep everything visually organized.
  • I usually color code each interview so I can easily see the different ones in my timeline.
  • Another way I color code is giving a different color to different subjects that are talked about. For example, I would make the sections talking about action all blue, and make the sections talking about struggles all green.

5. Piece Together the Story.

  • This is my favorite part. Once you have all your selects out of the interview, you get to begin the fun process of piecing them together in order on your timeline.
  • I usually group stuff in the way I want the story line to progress. I try my best to make sections of different topics or trains of thought. I create these mini story lines of sorts. I then try build it out and see if it will work for the film.

6. Fine Tune and Remove

  • Once I have built my basic story arc, I begin to fine tune the interview and clean it up a bit. For the sections where clips are playing over top of them talking, I try my best to remove their speech imperfections like 'ums' and 'ahs'.
  • In-between these new cuts there is often a pop in the audio of sorts. I add a transition called Constant Gain here in order to smooth everything out.

Try your best to enjoy it and not stress to much. Editing interviews can really be enjoyable once you get used to the process and gain speed and efficiency. It is really rewarding to boil down a 30 minute interview to a 2-3 minute well spoken piece.

Do you have any questions?

If you have any questions about any step of this process, or maybe you know a better way to go about it, please get in touch, I honestly would love to hear from you. The best way to reach me is by joining the Leftcoast Collective and responding to me directly by email. You can also always connect with me on Twitter or Facebook.

Download Free Guide

I have made this guide available to all current and future subscribers of the Leftcoast Collective. If you would like to receive a copy of it directly join the Leftcoast Collective bellow. I will continue to send free great content every Thursday and you can unsubscribe at any time. [yks-mailchimp-list id="e34efe9754" submit_text="SEND ME THE FREE EBOOK!"]

Written by: Levi Allen

Levi Allen

How to Craft Real Stories with Great Interviews: Featuring the Kaléo 2015 Film

https://vimeo.com/127073088 This week I got asked a question from Alyssa, "Levi, I am just starting out with filmmaking and I wanted to learn how to conduct interviews, could you share some of your tips?"

I just created a film that was heavily driven by interviews (as seen above).  I thought it would be an excellent opportunity use this piece as a case study of sorts as I talk about my interview process. My goal in this post is to teach you how to go about creating better interviews for your next film! First I will share my approach to interviews, and then share some behind the scenes info on this Kaleo film.

How to Craft Real Life Stories with Great Interviews

This post is going to help you learn how to capture better real life stories. I am going to push into an important component of how I approach storytelling, getting great interviews with ordinary people.

Interviews as the Backbone of Story

The filmmaking style I am developing definitely relies heavily on using interviews to convey the story. In most cases I find that I am interviewing people who have sometimes never been on camera before in their entire life. But I have learned a few tricks to make the whole process a lot more natural and comfortable for everyone involved.

Once I have captured the interview I eventually end up cutting out the main best bits of their talking and using this audio drive a visual story. I don't include the audio of my questions being asked, I only use the visual and audio of the subject.

The Preparation

The nature of the interviews I normally conduct, do not allow for a whole lot of pre-production. If you are interviewing a public figure or an artist, you need to do your homework and study up on the subject. Yet most of the time you might be interviewing someone who has nothing about them on the internet. In this case there is not much that you will have prepared going into the interview. What I normally do for every interview anyhow, is sit down on my own before hand with a piece of paper and sketch down some thoughts or ideas I would like to cover. I don't use this as a formula I have to follow, rather just as an idea sheet for those moments in the interview where I feel stuck and don't know where to go. I find this small bit of prep helps a lot and makes me feel a lot less panicked about what I need to cover.

Learn About the Subject

Do you know much about subject you are going to be talking about with the person? If not you should definitely spend some time learning about the subject, are you going to talk about this persons massive Star Wars collection? Well then, you should probably know a thing or two ahead of time about Star Wars.

Chose a Location that is Distraction Free and Comfortable

Your goal as the interviewer is to get your subject into the most comfortable and natural state as possible. You want to get them talking as if  they were in a conversation with an age-old friend. This is hard to do in a location with lots of distractions or unwanted interruptions. I ask them to sit on the edge of the chair so they their body position naturally seems more interested in what they are talking about. This way they don't slouch their shoulders and lean back in the chair as well.

The Technical Gear

This could be an entire post in and of itself, but I will give a few tips that I use. When setting up your angle, try to have the camera at eye level with the subject or a little bit above. My goal with angles and lens choice, is to make it feel as if the viewer is sitting there with the subject. Use good composition and have the subject look slightly to either side of the camera. Having them look to the long side of the frame (as shown bellow) helps create a far more natural feel. You can get stylistic here if you are trying to convey a certain feeling, but this is usually my starting place with single camera interviews.

Don't Slack on the Audio

The biggest part of what will drive this interview is good clear audio. I use a wired lav connected to a Zoom H1 to  record my audio. It is strongly recommended to have two sources of audio such as a shotgun mic and Lav, but I currently have not invested in this. When setting audio levels I usually tend to get a conversation going with the subject trying to make them feel comfortable. I don't even let them know I am setting levels, I just try get them to talk about themselves or where they are from. While they are talking try set your levels and leave a little room so if they get excited it won't peak the audio


The Most Important Part: The Interview Itself

In order to conduct a great interview, you need to be a well-practiced conversationalist. This is by far the most important part of getting consistent results from a wide variety of people. Your goal is to get them comfortable and forget entirely that they are on camera. Most people are super nervous about the whole process and the quicker you can get them comfortable, the quicker you are going to start getting the audio bits you actually want to use. When first sitting down I tend to explain how the interview process will go, "It's going to be just like a conversation, don't worry about the camera, you can talk directly to me." I sometimes explain as well that I would like to have them include the question in their answer. For example, Q: "How do you like being interviewed?" A: "I really enjoy being interviewed."

Instead of

Q: "How do you like being interviewed?" A: "I really enjoy it."

You must be a fantastic listener

Once the interview starts and the technical components are rolling, your full-time job is being a fantastic listener. You need to make them feel as though you care immensely about what they are saying. You need to ask great questions that build off what they just said. You should ask questions that make them think, "Man i've never thought about that before."

The moment you look down at your paper for your next question, you have pretty much lost them.

This is so challenging, but you need to keep eye contact with them and avoid being distracted yourself. You can look at your questions from time-to-time, but if the interviewer starts to feel like you are following a script, you will get results as if you were following a script; forced and unnatural.

Editing Together your Interviews in Post

This step is incredibly important as well. Important enough that I decided to make an entire blog post about it next week. If you are not apart of the Leftcoast Collective already I strongly recommend getting on board so you can find out when my latest posts are released, you also get a free ebook which is pretty cool.

Some Behind the Scenes Info For the Kaléo Film

The Purpose of the film: This is a film that I created to document and share the story of an eight month leadership program on Vancouver island. This piece was driven by interviews that I conducted with ordinary people who had never been in front of a camera before. The format is a little long as it was not necessarily made to be viewed online.

The Filming Process: I gathered my footage throughout the year whenever I had the chance. My primary job was as a leader on the trips, so filming definitely was not a priority. For this reason my kit was usually really light. I rocked a top loading Tamrac bag so I could pull out a camera at any time and film. Using the Rode Video Mic Pro for Audio I shot primarily handheld or with my homemade stabilizer using mostly the Tokina 11-16 or my Rokinon 35mm f1.4

The interview shots were all done with my sigma 50mm 1.4

The Editing: I edited this piece in the few days coming up before their graduation. From the start of the editing to the time it was screened, I had just under a total of  36 hours. I cut all the interview selects, and then started to piece together a storyline. Then I went through and cut all my favourite BRoll and started adding that in over top.

The Grading: I only invested about an hour into grading as that was the only time I had. I did a basic color grade through lightroom using VSCO. I am not to happy with a few of the shots, but most of it turned out just fine.

All in all the project was heaps of fun. I always wish I had more time to edit, but It was literally right down to the deadline on this one. I literal just finished encoding the project 5 minutes before the grad ceremony started.

Woah, this ended up being a bit of a wordy post. I hope you got some value from it. As always if you have any questions connect with my on social media, or join the Leftcoast Collective and send me an email directly!

book cover

Download Free Guide

I have made this guide available to all current and future subscribers of the Leftcoast Collective. If you would like to receive a copy of it directly join the Leftcoast Collective bellow. I will continue to send free great content every Thursday and you can unsubscribe at any time. [yks-mailchimp-list id="e34efe9754" submit_text="SEND ME THE FREE EBOOK!"]


Written by: Levi Allen

Levi Allen